
The Support troop with the LMG has less Morph Targets for his speech. I donned my balaclava which I use when paintballing to see how the mouth shapes show through. The only 3 that showed anything of value were the shapes for A (E didn't show any difference and looked similar to CDGTh and so on) O (similar to UQW) and M which would catch the material slightly and draw it in.

A

O

M
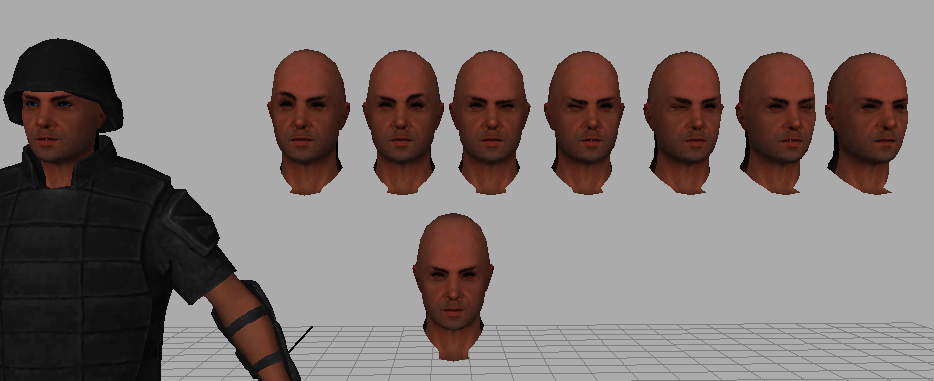
For the general face shapes I used shots used in my Dissertation. These are examples of the 9 key mouth shapes. I've labelled what they are beneath.

AI

CDGKNRSThYZ

E

FV

L

MBP

O

U

WQ
Jennifer Conley shows how to have the model's Morph Targets not give you the Spikey Ball Of Death (SBOD). This video was extremely helpful for me in this stage, as I was having to extract the head of the model to edit.
A problem I found was that I could not edit the face in programs such as Zbrush and import the edited head back into Maya and have it work. This I believe is because the names of the verts will have been changed, which results in the SBOD. This meant I had to edit the morph targets in Maya itself, which I had avoided in my first semester in the Short Story project. This time however, the mesh flowed perfectly and editing in Maya was very easy. It also let me keep track of the texturing. A problem I had come across in Short Story was that the textures would crush as a result of editing in Zbrush and being unable to see the texture details. It resulted in the character having almost Geisha-like lips at some points, which was covered anyway due to the low lighting of the scene. With this piece, however, the textures have been fine because I could see when I have moved a vert too far. Soft Selection was my best friend for this. A lot of changing the spread was needed, so I could keep control over what I was moving.
Overall, I'm happy with the end result!
I have to rig the characters next, but that is not a major problem as I have previous experience with rigging in Maya. From there, I can focus on the animation. Which I should have a start on this week.
No comments:
Post a Comment