Showing posts with label reference. Show all posts

Friday, 14 November 2014

Phoneme Shapes

Lip syncing - There are 10 basic shapes of the mouth when it comes to lip sync.
 *Courtesy of Rubber Onion Animation

A and I: For the A and I vowel sounds, the lips are generally pulled a bit wider, teeth open, tongue visible and flat against the floor of the mouth.
E: The E phoneme is similar to the A and I, but the lips are stretched a bit wider, the corners uplifted more, and the mouth and teeth closed a bit more.
U: For the U sound, the lips are pursed outwards, drawn into a pucker but still somewhat open; the teeth open, and the tongue somewhat lifted.
O: Again the mouth is drawn to a pucker, but the lips don't purse outwards, and the mouth is rounder, the tongue flat against the floor of the mouth.
C, D, G, K, N, R, S, Th, Y, and Z: Long list, wasn't it? This configuration pretty much covers all the major hard consonants: lips mostly closed, stretched wide, teeth closed or nearly closed.
F and V: Mouth at about standard width, but teeth pressed down into the lower lip. At times there can be variations closer to the D/Th configuration.
L: The mouth is open and stretched apart much like the A/I configuration, but
M, B, and P: These sounds are made with the lips pressed together; it's the duration that matters. "M" is a long hold, "mmm"; "B" is a shorter hold then part, almost a "buh" sound; P is a quick hold, puff of air.
W and Q: These two sounds purse the mouth the most, almost closing it over the teeth, with just the bottoms of the upper teeth visible, sometimes not even that. Think of a "rosebud mouth".
Rest Position: Think of this as the "slack" position, when the mouth is at rest--only with the thread of drool distinctly absent.

Sunday, 27 April 2014

How Your Face Changes In Different Lighting

This was shared by Stephen Brooks, of Rubber Onion Animation on Facebook.

http://pixelbark.com/8664/how-your-face-changes-in-different-lighting

A short video showing how different lighting changes the expressions and overall appearance of the face. A really cool video.

Saturday, 29 March 2014

RayFire test

EDIT: http://youtu.be/1eAB4ZecrVY
The above link shows the awesome power of RayFire

I got my grubby mitts on a trial copy of RayFire. I did this test to try it out.
The Plane is a Static Object, the Ball is a solid object and the box is fractured. When it collides with the other objects, it shatters.

Monday, 24 February 2014

Saturday, 22 February 2014

Muscle Rigging - Week 3

We have been looking at adding muscle rigs to the meshes. It is not necessary to fully rig up the zombie rig with muscles, but I will be looking at adding a couple muscles to it. Especially to the stomach, so I can emphasise the stomach movements.
To practise, we were given a "Muscle Man" rig.

I took looked around online for some muscle diagrams.
This image is from http://anatomy.askthetrainer.com/ - a training and fitness website.

I chose this image for the simple fact it gives you both front and back diagrams. I also went and printed this out to keep on my wall next to the computer so I can see the muscle system with just the turn of my head! A nice tip for everyone.

The muscles are set up with a series of clicks from the MuscleStrand option, under CAT Objects.

Under the modify tab, there are options for editing the muscle. I have set the muscles to Bones and to allow Squash and Stretch. Squash and Stretch will allow the muscles to flex when they are linked to the CAT rig.

I have named the first muscle Pectoral01, as this will make it easy to keep track of what muscle is what should I need several muscles on the rig. It's a good habit to get in to. 

I placed the muscle over where I needed it to be, in this example, over the chest and leading to the arms/shoulders.

By relaxing the muscle with this setting, I can keep the rig inside the mesh and will allow an impressive flex. I then connected the muscle to the ribcage and the upper arm.

I keyframed some animation, the arm lowers and then raises right up, then back to the starting position. This screencap shows the muscle being stretched.

I also added a second muscle to work as the muscle between the shoulder and the neck, the Trapezoid. 

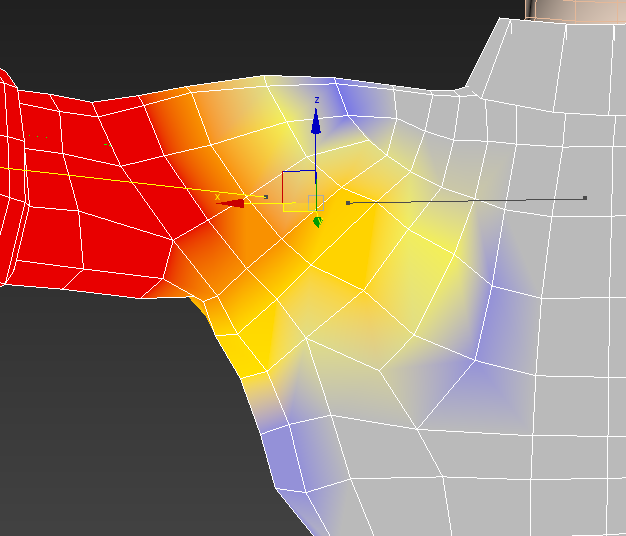
When the arm was raised too high, the mesh would crumple, like this. I couldn't correct it with weighting, so I lowered the arm in the animation. This sorted it out.

As I had done with the zombie mesh when skinning, I added the muscles to the bone list, then began to edit their weighting. I used the Paint Weighting tool for this as it is a high poly mesh.


This is a render of the muscle rig.


I will want to go back and alter some of the weighting and maybe even the location of the trap muscle slightly. I would also alter the animation slightly, making it more of a Lateral Raise. This would move the pectoral muscle slightly, and the trap much less (unless his form was off, in which case his trap would be being worked more than his lats. Bro, do you even lift?)

To do this, I would be using workout tip videos, like this one by Matty Fusaro who talks you through the yes and no's of Lateral Raises.
http://www.youtube.com/watch?feature=player_detailpage&v=HJG-gvG2N5E#t=177


I wanted to add the Bicep into the rig and have him flex his muscles in the final render.

Sadly, it destroyed the mesh.
It puts me in the mind of the cartoons, where a weak character flexes and his muscle drops down.


The final render with the weighting corrected and bicep removed.

Zombie Rigging - Torso - Arms - Head

Continuing the rigging of the zombie, I moved onto the torso.

I selected the areas around each of the bones and blocked them out. 

The first piece I began cleaning up on the torso was the Belt. This area is a constant width, so I had to keep that in mind with it;s weighting.

The belt is part of the spine bone so it will stay at it's constant width. It only needed a small weight edit.

A closer shot of the belt.

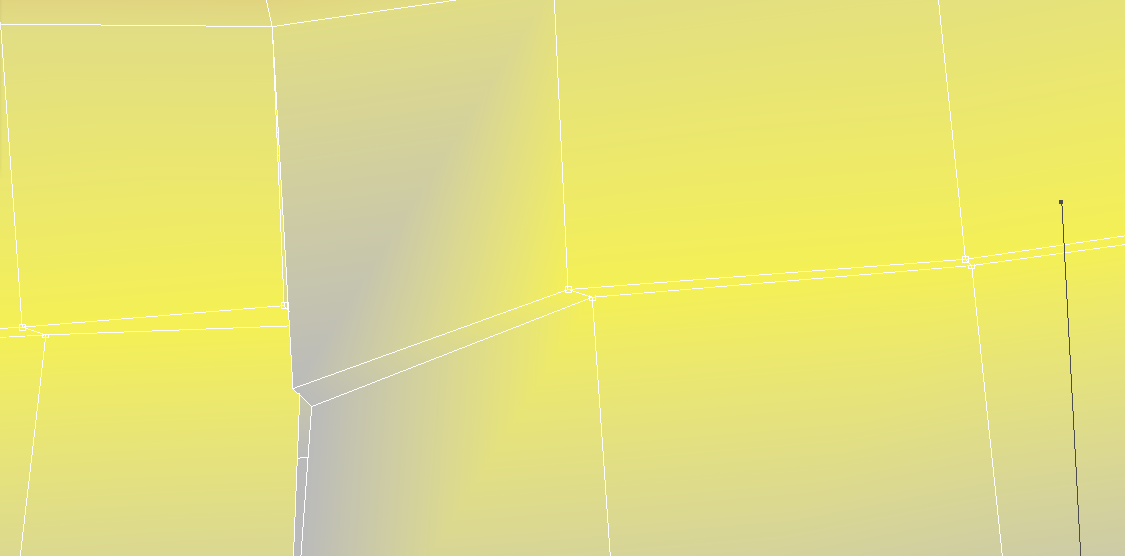
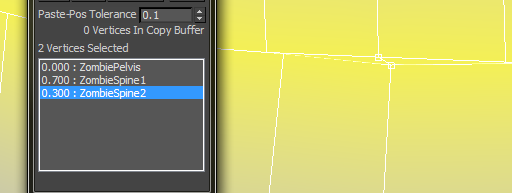
I found a slight error from the welding. It didn't weld it at all. This was a constant thing I had to fix, ensuring that any loops had 30 vertices selected became second nature when working on the torso.

To fix this issue, I just matched the weighting with the rest of the loop.

Blending the torso together finishes off the torso.

The toughest part of this rigging was just the error from the Weld and getting used to the fix I had done.

From here, I moved to the Shoulders, then down the arms.

Weighting areas to the Clavicle then blending them to the shoulders is a little tricky to get right just because of the way the shoulder reacts when moving. Starting with a 10% weighting at the neck/collar is where I kicked off.

Blending down the shoulder takes a certain mindset to know you are getting it right. I think I've touched on this before, where as you are working on the areas, they will look NOTHING like how you are wanting it to look until you are finished and it just clicks into place. Once I got my head around that way of thinking, it became easier to do. This shot is a perfect example of it. The big difference in the weighted section and the parts left to edit can be off putting.

Blending the next loop drops the gap down, then moving further down the shoulder, it clicks into place perfectly! 

The basis of the shoulder is weighted. From here I finetune the areas so as to get a smooth transition for the movement.

The underarm area was tricky to nail down. I used my own movements to get this section working properly.


This is the reference footage.

I then moved to the arms.

As always, I block out the areas to start. It makes blending the areas that much easier.


To get the elbow crush correct, I had to trial and error my way through it and to make it blend convincingly. This was the toughest area of the arm, I found.

Blending the forearm includes part of the sleeve. This is mainly for extreme arm twists, it will drag the sleeve cuff, slightly.


The bottom part of the forearm, I blended the upper forearm and the wrist together. The underside of the wrist has a slightly stronger influence.

I moved onto the hands. This was a fairly short process.

The hand needed blocking out, removing the influence on the fingers. These will be sorted out later.

Also, the crushing on the wrist needs tweaked right away. 

Using the opposite poses to where I want to edit, I select the vertices and begin to blend into a smooth transition.

The top of the hands.

For some reason, the hand had a couple vertices that would not change. I had to find the bone that was connected to the vertices and select a weight of zero. I don't know why it wouldn't allow me to do it direct to the new bone selection.

I worked on the fingers next.

The fingers needed a lot of work to get right. From the start, the fingers would splay out. This portion infuriated me to no end.

The fingers needed a lot of blending to make them look right. I would start from the tips and work down to the hand. The thumb needed so much work, as the third portion of the thumb is part of the hand itself. Getting this right made the hand really come together.

Here is a render of how it came out.


I then used the Skinwrap tool to take the symmetrical mesh and place the weighting on the original mesh.

After unhiding the original mesh, I applied a Skin Wrap modifier to it. These were the settings I used.


Ensure the proxy mesh and the original mesh are in the same position. I tried like this after scrubbing through the animation to check it was all fine and it matched the animation like this and looked very strange.


The tutorial said you could remove the proxy mesh at this point, but when I did, the animation would not carry over to the original mesh. It was a simple case of backing up.

Next was the head.

I set the eyes and mouth to be part of the head via the parenting option.

It keeps them as part of the rig in this way. 


Setting the head up to follow the head is the same as registering the bones, like I had done with the rest of the body.

When scrubbing the timeline to make sure everything was connected properly, I came across this little error.
It was a simple case of adding an extra bone.


To the bone, I gave it a weighting value of 100%. This would keep the neckline in place.

I would then blend the neck to give a smooth movement.

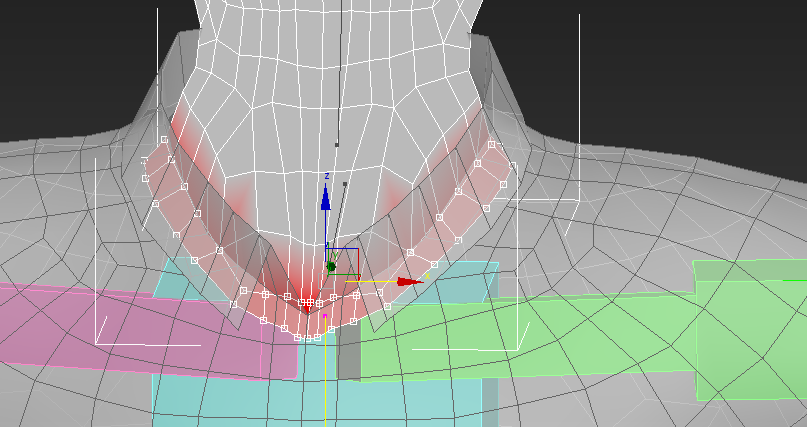
I had to play with the weighting a little more to stop the neck from breaching the torso when it moved.

This is a render of how the head movement came out.


My blog would not let me upload my reference footage, so I put it on Youtube. Here is the link.
http://youtu.be/ZbbjnEUPlw8


Thursday, 13 February 2014

Friday, 7 February 2014

Skeleton to CAT Rig

Something to bear in mind about the CAT rig is the amount of vertebrae  in the spinal column. This CAT rig is set with only about 7 sections. This is alter the smoothness in some movement, ie; bending over and back.
If I match the amount of bones on the CAT rig to around that of it's human counterpart, I should be able to recreate a very smooth arch in the back.
The picture I have attached here is a composite of the CAT and a skeleton. The RIG is slightly off, as I didn't make this RIG for the skeleton. It is the one I used in the Spiderman test. Something to note with Superheroes design is that they are often made much taller that "regular" humans. Their limbs are often slightly elongated, or in some circumstances, reduced.

Thursday, 6 February 2014

L5 - Digital Visual Effects - Scene ideas.

This project involves working as a team to recreate the VFX from a scene in a film.

The group is;
Phil Baggot - Phil's Blog
Shaun Fontaine - Shaun's Blog
Chris McEwan - That's me!

We are all looking at scenes which we'd like to make, then pooling the ideas and selecting one.

Tron Legacy - Recognizer Scene - 0 to 40 seconds.
http://www.youtube.com/watch?v=ub4tJAJCpo4
There would be a lot of 3D Modelling involved with this  scene. The buildings could be done through either Matte Painting or adding 3D modelling elements to video footage.
There would be some Blue Screen work, possibly.

Scott Pilgrim Vs The World - Todd the Vegan scene - 2:08 to 2:34, then 2:43 to 3:29
http://www.youtube.com/watch?v=nUbgQLGKXdM
Large clips and very likely insanely difficult to do, but would pretty damn cool.
There would be a small bit of blue screen work in the first clip, when Todd is hovering in the hole in the wall.
The hair would have to be simulated, which could be done in 3Ds Max. The green lasers and the de-veganise ray would be done in either AE or Nuke, as would Todd's glowing eyes.

UFO (2012) - Ship reveal scene - 1:07 to 1:14
http://www.youtube.com/watch?v=gU6XUD8tEOc
This is just the trailer, but I have the actual film (regretfully, but at the same time, not!)
The ship would be a 3D model and a shot of Leeds would be used as a clean plate.
Digital Doubles would be used for the crowds further down the street. This wouldn't really be an issue as they are out of focus, so detail isn't major. They could be animated in either Max or Motionbuilder.
Plus, this guy.
http://www.youtube.com/watch?v=gU6XUD8tEOc#t=127

Shaun of the Dead - She's So Drunk - 1:20 to 2:07
http://www.youtube.com/watch?v=PAyF7zmJXjA#t=80
The DVD extras show you how this effect was done. The pole is digital and the hole through the zombie is made through multiple layers in post.

Saturday, 1 February 2014

Ragdolling

Here's a render of the Ragdoll test.
The model uses a Ragdoll solver to generate the falling. I resized the effectors - if any of them are in contact, the model will instantly drop and "twitch" - to create the collision points. Adding a Rigid Body solver to the wall and setting it to Passive (so it doesn't move when hit), when the model connects with it, the animation stops and the ragdoll process begins.

The more time I spend on resizing and moving the effectors, the better the result.

I'm already getting an idea of what I want to do for the Motion Capture piece which would incorporate some ragdolling, perhaps!

Wednesday, 19 December 2012