Showing posts with label FINAL PIECE. Show all posts

Sunday, 19 April 2015

L6 Production Project - Alien Assault

NOTE:
As embedded videos do not save in Archived Pages, I have provided direct links to each video

The final piece for the Production Project.


The Storyboard for the sequence

I ended up dropping sections of this storyboard (Page 3- Panel 3 onwards), as I simply did not have time to get everything together. What I do have for the final piece I feel is pretty accurate to the storyboard.

Getting this project finished was... a nightmare for me. Drowning in stress and errors was the most terrifying experience I've had. My presentation for the piece could not have gone worse, really. I was exhausted and defeated. The feedback I was given, however was priceless. After taking that day to just de-stress and get my head back together, I was ready to get my nose back to the grindstone. I redid the opening sequence partially to remove the bizarre camera moves and lip sync, plus fixing the "zombie eyes" that plagued the initial video.
Night of the Living Headache - Part of my presentation video with errors.


Whilst presenting, my computer was rendering a scene out for the final product. When checking that batch render, I discovered yet more problems which were not in the frame render I did. The aliens seemed to be black, no texture on them, just floating eyes. Upon further tests, it turned out they were rendering as alpha channels.  (See below)

How the alien should have looked

I ended up re rendering this scene (plus another I had rendered by a friend, as it had the same problem). This time, however, I rendered as .png (and at  HD720 to quicken the render process. I had no time to waste.)
Problem solved!

Thankfully, this fixed the "Stealth Alien" problem, as I came to call it. I also fixed some camera work in this scene.

Alien Shooting

After Effects layers for alien shooting

The alien shooting sequence comes from a test I had done through the Summer from Video Copilot.
 
What I had made following Video Copilot's tutorial

After I had made that, I knew that I wanted to do more with it. It was a fun effect and relatively simple to make (and let's be fair, after all is done with this project, ANYTHING is simple!). As the aliens in my piece were not using conventional weapons, the Sci-Fi gunshot was a clear option. Making this effect used VC's Shockwave assets and for this project, I added a Sparks asset from Action Essentials 2 (also from VC) and added a Polar Coordinates effect so I could have the sparks move in a circle, rather than flat. The weapon fires several elements, from the directional light from the muzzle flash, the shockwave flash and the shockwave projectile which is launched towards the camera, then the sparks which follow.  In the screenshot of the After Effects layers, the White Solids are the muzzle flashes which are single frames of a flash, starting with just the barrel being filled with light to two flashes which are slightly altered and give a green flash which fills the screen.


This clip is a 1st person shot of the alien's round being fired.

I used this in my presentation to show an effect I was going to have in the final piece, but it was eventually dropped.
Unused Scene 01

So I dropped this scene, as I would have had to render some extra frames at the end. Simply freezing the last frame would keep the soldier in shot and would look off. I was also just not impressed with the effect overall. It was confusing and just didn't work. The explosion and sound effect are both from Action Essentials 2
Part of the explosion had to be masked out, so it didn't show over the soldier, who was in front of the blast.

Unused Scene 02


I dropped this scene for two reasons, the scene previous was dropped (the 1st person shot where you see the soldier sliding into cover) and the scene following it was not rendered due to time constraints. The following scene was to show the alien being shot off of the car. The above clip does not have sound.
I had even researched the recoil of the weapon (P90) and the movement in the scene features that.

I relied a lot on limited animation and being clever with camera placement. If it wasn't in shot, it doesn't get moved, simple as that. This saved a lot of time on the running of the character. You don't see his feet or legs, so I didn't have to move them. This isn't a new idea, however. It's one of the greatest time saving techniques going. That and 2's. Or 3's if you're making anime. 

Live action reference footage was a godsend, too. A lot of what I have will come in handy for the future, and I'd like to think I'd redo this project one day (just for fun! I don't plan on resitting this!) Possibly even do it in 2D. As I do love 2D! 

RENDERING!
Rendering was the bane of my life! I was rendering at 1080 with a decent quality, so I could give a good looking product. However, render times were MASSIVE. The Presentation video took over 30 hours to render. This alone destroyed my plans. I had begun rendering later than I wanted, as I was encountering issues with animation and lip sync. I resorted to rendering at HD 720 to speed up render times, but I also went back to the main scene which I was referencing in Maya. I cut the scene up to create more of a film set. This massively reduced the data Maya was working with and helped with rendering even further.
I had made a huge mistake with the modelling. I spent a lot of time making a beautiful scene, where I was not really needing such detail. My thinking of it was Jack of all trade. Be a generalist, I can model environments, I can animate characters and lip sync. However, with all of these areas, I was backing myself into a corner when problems arose. As seen in earlier posts, my scene began self destructing which required troubleshooting. But on the flip side, I did learn how to troubleshoot effectively!
Martin Bell of Yes, Commissioner!  helping with Troubleshooting

When compositing my footage, I had to fix the Gamma settings on the OpenEXR files. After Effects was applying it's own Gamma to the files, which was having them far too bright and destroyed the colours on the weapons, especially the P90. The magazine on the top of the weapon had it's colours distorted so much. Gamma correction fixed the issues.

Hindsight is 20-20. When I look back on this project, I see so many things that I would have done differently. The main thing is changing my entire idea. Instead of an action sequence with speech, just focussing on speech!
If it needs a background, just do a simple one! Focus on the facial animation! 

Creating sounds! Sound effects in the sequence range from a "Pulse Grenade" for the Alien gun, war background noise which has it's decibel level dropped, my voice, me making gutteral, throat noises for the alien shouting and just setting the microphone in front of my cat Tippy while stroking him for a purring which became the noise of the aliens. When the alien jumps onto the front of the Humvee, I took the sound of someone sliding over a car bonnet and matched it to the impact of the feet and hands of the alien hitting the vehicle. As the alien is a skinny creature, I assumed the creature is light, so the sound is very subdued, but without the sound, you can tell it's missing. 

I have learned so much in the course of this project, from modelling techniques, skinning and rigging in Maya, creating custom attributes for the skeleton (like the hand controls where I can control the fingers from sliders) to taking the Morph Target process from my dissertation further and having the blendshapes of just the head being applied to a whole model. What I am taking away from this most, though, is "Work Smarter, Not Harder", "Keep It Simple, Stupid". Don't be a scope creep, meaning, if I have to say to myself, it's a lot, but I can do it, that should be throwing up red flags so go back to the drawing board. And to trust in my ability. For a while, it felt like I was never going to get it done, but here I am! Yeah, it's not how I wanted it to be, but that goes into my previous point. 

Saturday, 24 May 2014

L5 Digital Visual Effects - Report

Above is the final result of the Digital Visual Effects project. We recreated a scene from the Gareth Edwards film, Monsters. In the scene, a monster picks up a car and tosses it aside. The reason we chose this sequence is because we wanted to attempt to make a visual effect sequence at night, as it is host to numerous challenges. One of the main challenges found was in the lighting on the 3D model and matching as close as possible to the real world car which it was to replace in the scene. The real world car had reflections which we were not able to recreate in the 3D model, something we have said that if we were able to shoot again, the cars would be parked further apart. We weren't able to shoot again because the car we needed was unavailable, as it was one of Phil Baggot's friend's cars and they were not available after the initial shoot. Colour matching the vehicle at night also proved difficult, which ties in with the light matching. This made it a lot harder to have the 3D car blend seamlessly with the real car for the shot, as it was in one single shot, like how Edwards had done his. Using a focus pull onto the driver of the camera car, the car in front blurs out. The second before the car is lifted, the 3D model is placed into the scene, then the focus shifts back to it. Having watched the scene so many times, we were able to find the exact moment the car was switched. This was crucial. We even noticed that the 3D model only has a vague resemblance to the real one.

IN THE BEGINNING OF THE PROJECT:
When we formed our group, Shaun, Phil and I decided we would go and choose a few different sequences we would like to recreate and look at how they were made. We would then look at them all and see which we thought would be the best and most interesting to try. We opted for Gareth Edwards' monster film, Monsters. What really attracted us to this film was the way Gareth had made the film. It was done with very few people and he edited and composited the film himself with Adobe After Effects, a program we have access to, so we could get a very authentic edit of the film. Also, the monster rig he used was a modified Spider CAT rig in 3Ds Max. He simulated the tentacles with Reactor, however. This meant we could not use a modern version of 3Ds Max.

We worked out a work flow for what we would be making;
Offline editing
Taking BMD flat Log convert to Prores/DNxHD
Linear workflow
Mulitpass compositing including Zdepth
CGI will be rendered in OpenEXR
Planar Tracking

And we took a look at what problems we may run into:
Noise, Rolling Shutter, Difficult shot and the shooting style.
Noise:
The noise is able to throw off the tracking of shots. Noise is especially prevalent in dark shots, which is what our sequence is. If we raise the ISO to give ourselves a brighter shot, we are going to open ourselves up to more noise, so we have to be very careful and shoot on a lower ISO. Noise is always going to be there, but we can remove that in post. At the end of the sequence, however, we will add noise. This will keep the CG elements looking like they belong in the scene.
Rolling Shutter:
Unless the camera has Global Shutter, you will be dealing with this. The sensor scans from top to bottom, meaning that if the camera is moving side to side, your image is going to be skewed, like this: \
For our shot, however, we don't have to worry so much about this, as the majority of the shot will be steadied.
Shooting Style:
We will be avoiding the Shaky Cam/Handheld feel by having the camera stabilised. This would remove the time needed to correct the footage later.
Difficult Shot:
Shooting at night is not ideal. With issues from Noise and high ISOs, to needed good lighting to just see ANYTHING. But what was going to be a real problem was that there are no tutorials to help us with this effect. We have to watch the sequence frame by frame to see when things change, how things change, why he changes it there.

We split the project into sections and worked out who would be working on what parts.
I was tasked with creating the Monster rig - having it ready to attach the tentacles that Shaun was going to make, animating it for the pickup, and animating the car being picked up. Phil would handle the car being thrown aside. I would also have a look at simulations for fog. My skills with Maya were not up to scratch, however and I was unable to make a suitable fog effect.

We also looked at locations.

A good spot for the night shot was this area of Ash Road. It is near where Phil lives and he said that at night, the spot would be perfect, as the street lights are far enough away to not be a problem and the trees blocked the lights from the main road behind. Sadly, shortly after choosing this spot, the council had cut the trees down.

Near me, we found this little area. There were no lights, far enough away from the Ringroad... It seemed perfect!
But the area is fenced off, so we couldn't get cars there.

Shaun suggested Danby Forrest. The problem here is that it's in the middle of nowhere and getting to it would be a pain.

Another possible location I found was Roundhay Park. There are plenty of trees in the area and reasonable access to them by road. 
In the end, we opted for none of these and found a spot on Headingley Campus, which leads towards the student halls. There are a lot of trees and no street lights.

CREATING THE MONSTER:
Gareth Edwards made his monster's rig using 3Ds Max's CAT system. To be true to the film, we decided that's what we would do, too.
Loading up a SPIDER CAT rig and deleting the pedipalps and some of the legs, then adding to them with extra bones was how I would end up making the beast. Aligning the legs into roughly how the monster should have it's legs was a tricky feat. If they weren't right, the movement would be too lopsided or rigid. Getting the right number of bones in the legs would give you the right bend in the legs for when the monster stoops down to pick up the car, then stand back up. Too many bones and it would stoop too low, too few bones and it would look like it was moving on stilts, not being able to bend right and making for awkward movements. It was trial and error to get the rig right. But with how Shaun had got the tentacles simulated and skinned, it was worth the effort.
The standard 3 bone legs did not give a good enough arc in the movement, something which would severely affect the animation. 


I did find, however, that 5 bones would make for a nice arcing movement.

To animate the car being lifted, I would require Shaun's tentacles to be added to the rig, and Phil to have modelled the car. Once these were done, I would match the movement of the car to the movement of the tentacles. The car lift and the tentacles would be rendered separately, as the version that the car was modelled and textured in would not carry across to the previous version which the car was made in. This was a part of our workflow which we had taken into account and were ready for.
Once the car was rendered out in passes, it was ready to be added into the scene along with the tentacles.

SIMULATION:
These were left out, as I was not able to get the fog to react properly. The result was just like thin smoke coming from an emitter. I tried to keyframe the fuel rate in Maya to change the rate that the fog was being created, but in the end, we had to accept defeat. This also was a problem for the dirt hits when the car hits the ground after being picked up by the monster. In the end, we had to resort to a Dirt Charge from Action Essentials. Action Essentials was only to be a last ditch effort, as we wanted to create our elements, ourselves.

When I tried to make the fog and dirt charges, I was using a simulation I had used for another project as a reference as to how to make it.


Explosion Simulation that I made in Maya for the Animation and Simulation module.

I had been able to change the rate the fuel was used, which would stop emitting smoke after a certain amount of time. I could not recreate this with the fog, however.

EDITING:
Shaun, Phil and I each took turns in editing sections of the video. I mainly roto'd out sections to allow the tentacles to pass behind the driver and passenger. I would remove the hard edge of the mask by feathering the edge. This would blend the clips together in a more realistic fashion, allowing the features to effectively bleed into eachother, giving you a slight overlap in colours, assisting in blurring the images. Part of the car landing shot I masked, too. The car rolling into shot would roll in front of the wing mirror, so I masked over it to keep the car outside. I also added Motion Blur to the car as it was picked up. Motion Blur is needed to make elements look realistic. Everything that moves is blurred. It's just how our eyes see things, so if you don't add the Motion Blur, it will stand out really obviously. The down side to adding Motion Blur is that it ups Render times a lot, especially in our scene, where you had multiple objects being blurred, ie, the tentacles and the car.
We used a Gaussian Blur on the car and tentacles for the pulled focus shots and keyframed it so it would match the focus of the footage. We kept a slight blur on the objects because, like with the motion blur, the eye always has some blur to what it sees. By adding the blur to the CG objects, it allows us to keep them fitting in with the scene.
I also added some film grain to the footage at the end, since we had removed grain from the original footage, we could add grain at the end which would include the CG elements.

Saturday, 14 December 2013

LEVEL 5 CONCEPT DEVELOPMENT AND ANIMATION - Storyboarding

I used these Storyboards to create my final animation.


The final image shows a mapping of the scene from a pulled out view.

LEVEL 5 CONCEPT DEVELOPMENT AND ANIMATION - CREATING LANEGAN

Lanegan took a few different forms before finalising the design.
(These images are taken from earlier posts on this blog)

The first form was this Lizard creature. I didn't feel like it fit in with the setting of the prison, so I scrapped this idea.


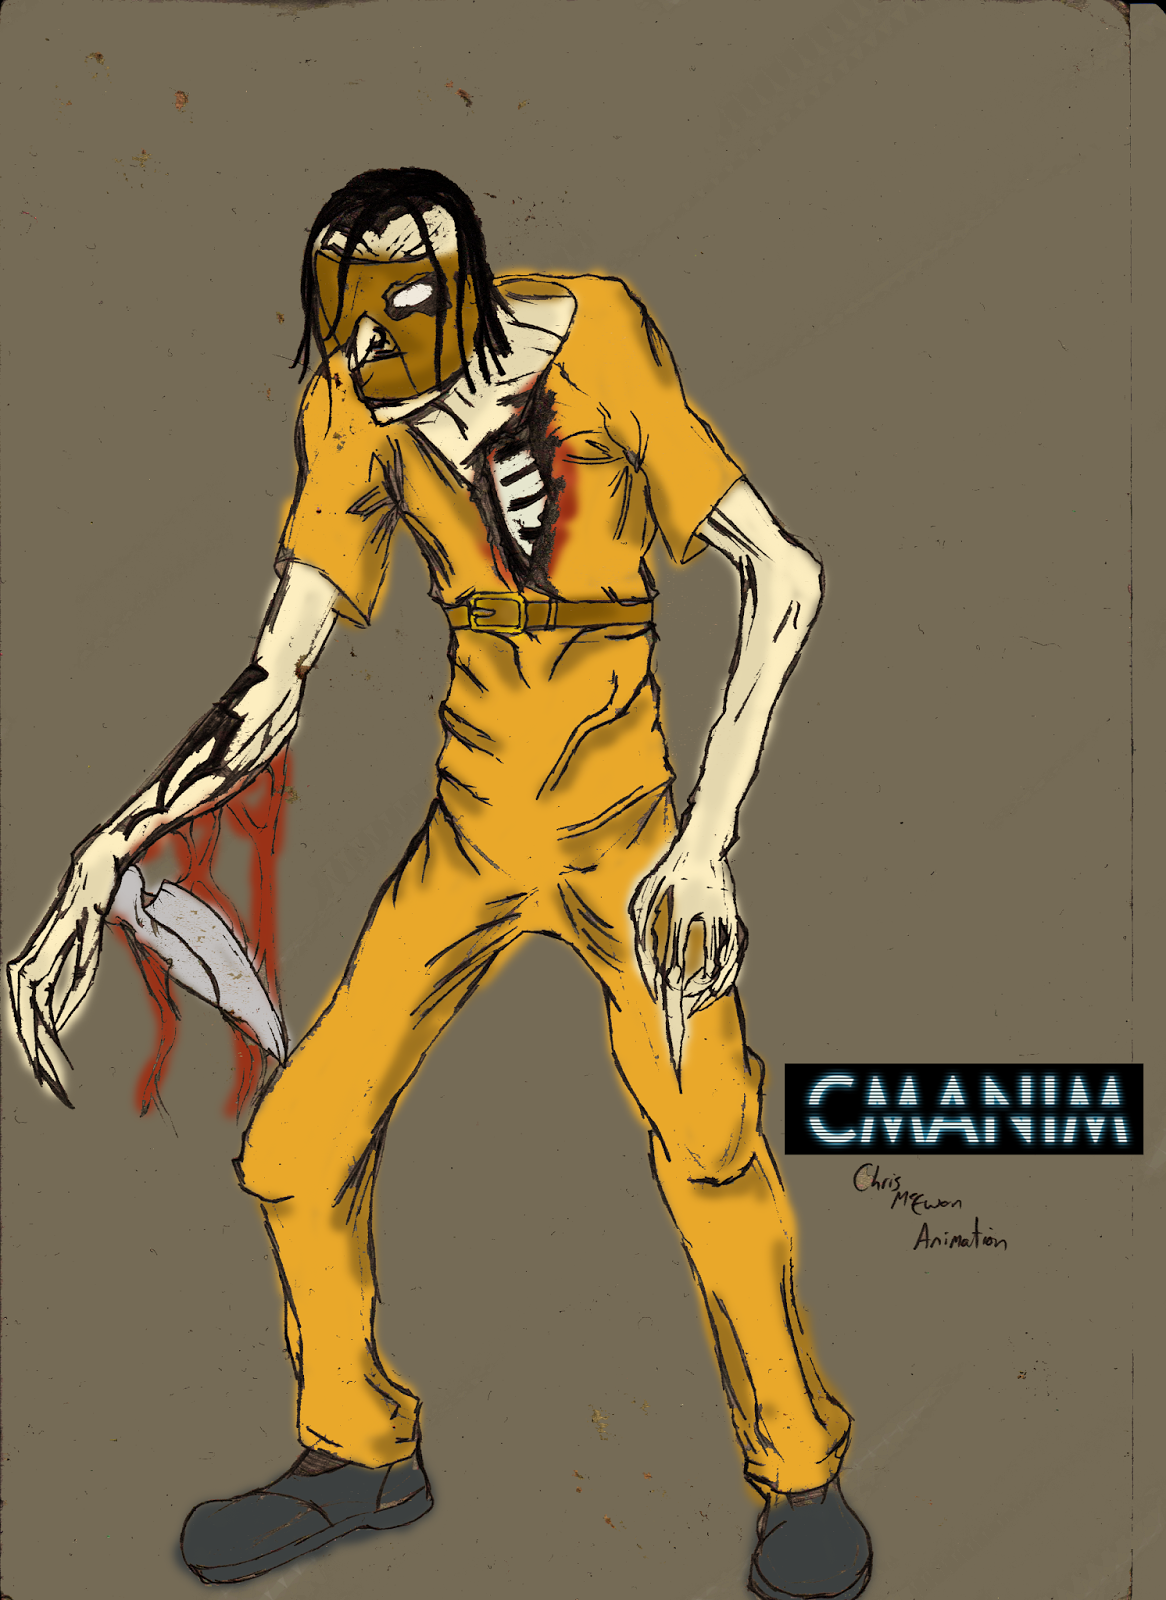
Thinking of Charles Manson, but demon-like, I created this character that I had been calling Man-Tis, based from his Mantis like blades and the tattoo on his arm. He was wearing his Prison jumpsuit, but didn't look demon enough.

Whilst researching prison uniforms better and capitol punishment, I came across a game for the PS2 called The Suffering, which featured creatures that were nearly identical to what I had designed.

For the demon look, I turned to The Evil Dead to look at the Deadites. The top left is from Army Of Darkness and the bottom right is from the original Evil Dead.


Remembering Ghostbusters 2's Scoleri Brothers (from the Courthouse scene), there were two ghosts that appear in Electric Chairs. Tony Scoleri is the skinny, lanky ghost who I researched further. I found some interesting notes from the development of this character.
Tony Scoleri went through three stages of development. The first stage involved using a full-sized puppet with an articulated head. Mark Wilson built the prototype and video tests were promising but Dennis Muren believed the rotoscope load required would hamper the production schedule. Tony was redesigned to be portrayed by Jim Fye. Tony's head was attached to a skullcap positioned in front of and on top of Fye's head. The collarbone was lowered to elongate the neck and add to the emaciated torso design. Oversized shoes, extra lengths of cloth strips, droopy pants, and finger extensions were added to complete the skeletal look.

Changing the blades of my character became a main thing, as I didn't want to be creating something nearly identical to what was in The Suffering. Marvel Zombies features this panel where Wolverine's adamantium bones break free. Reversing the joint where the blade is attached (from the wrist instead of the elbow) would work well.
I drew out the way the blades would attach here.

 Using the demon faces inspired by Evil Dead, I drew this happy fellow up! Given that he was executed by Electric Chair, I would give him a hood or mask, which would have been used.

This image was to show various features of the character, where the blades break from (the scar tissue), tattoos and various hoods/heads.


 Close ups of the heads.


To add colour, I placed the images into Photoshop.

A 3/4 view of Lanegan. He is extending one of his blades.

Front and side

Lanegan is charging forward, revealig one of his blades as he strikes.


Colour versions of previous images. The final image shows some muscle tone which the creature has

LEVEL 5 CONCEPT DESIGN AND ANIMATION - MERCHANDISE

Promotional give away items. I used Cafepress (a website where you can make custom items which you can buy, and even set up an online store) to create the majority of these.

Hip Flask

T-Shirt

 - I made this mug in 3Ds Max using UVW maps to add the logo. The inner colour I set to match the main colour scheme of the logo.

CMANIM mousemat

 CMANIM glass

 Being a fan of Ice Hockey, I created my own Jersey

CMANIM promo pen (I made this one in Photoshop)

CMANIM Pocket Notebook


LEVEL 5 CONCEPT DEVELOPMENT AND ANIMATION - LOGO DESIGN

I created a Logo Design for myself. CMANIM - Chris McEwan Animation.

Following tutorials I made logos. I wanted them to look digital/futuristic so I started by looking at TRON. Tron Legacy tutorials helped me learn how to use some effects in Photoshop.


Using a different font, I made this one.

Pattern effects I made in Photoshop came into play with this image. Altering the Outer Glow settings to reduce the splash effect, I made the bottom image.


A shortened version, CMA is ideal for forums and Facebook advertising, and it's in keeping with the larger version for recognition.