Showing posts with label arm. Show all posts

Saturday, 22 February 2014

Muscle Rigging - Week 3

We have been looking at adding muscle rigs to the meshes. It is not necessary to fully rig up the zombie rig with muscles, but I will be looking at adding a couple muscles to it. Especially to the stomach, so I can emphasise the stomach movements.
To practise, we were given a "Muscle Man" rig.

I took looked around online for some muscle diagrams.
This image is from http://anatomy.askthetrainer.com/ - a training and fitness website.

I chose this image for the simple fact it gives you both front and back diagrams. I also went and printed this out to keep on my wall next to the computer so I can see the muscle system with just the turn of my head! A nice tip for everyone.

The muscles are set up with a series of clicks from the MuscleStrand option, under CAT Objects.

Under the modify tab, there are options for editing the muscle. I have set the muscles to Bones and to allow Squash and Stretch. Squash and Stretch will allow the muscles to flex when they are linked to the CAT rig.

I have named the first muscle Pectoral01, as this will make it easy to keep track of what muscle is what should I need several muscles on the rig. It's a good habit to get in to. 

I placed the muscle over where I needed it to be, in this example, over the chest and leading to the arms/shoulders.

By relaxing the muscle with this setting, I can keep the rig inside the mesh and will allow an impressive flex. I then connected the muscle to the ribcage and the upper arm.

I keyframed some animation, the arm lowers and then raises right up, then back to the starting position. This screencap shows the muscle being stretched.

I also added a second muscle to work as the muscle between the shoulder and the neck, the Trapezoid. 

When the arm was raised too high, the mesh would crumple, like this. I couldn't correct it with weighting, so I lowered the arm in the animation. This sorted it out.

As I had done with the zombie mesh when skinning, I added the muscles to the bone list, then began to edit their weighting. I used the Paint Weighting tool for this as it is a high poly mesh.


This is a render of the muscle rig.


I will want to go back and alter some of the weighting and maybe even the location of the trap muscle slightly. I would also alter the animation slightly, making it more of a Lateral Raise. This would move the pectoral muscle slightly, and the trap much less (unless his form was off, in which case his trap would be being worked more than his lats. Bro, do you even lift?)

To do this, I would be using workout tip videos, like this one by Matty Fusaro who talks you through the yes and no's of Lateral Raises.
http://www.youtube.com/watch?feature=player_detailpage&v=HJG-gvG2N5E#t=177


I wanted to add the Bicep into the rig and have him flex his muscles in the final render.

Sadly, it destroyed the mesh.
It puts me in the mind of the cartoons, where a weak character flexes and his muscle drops down.


The final render with the weighting corrected and bicep removed.

Tuesday, 4 February 2014

Rigging a CAT rig


As I will be using 3Ds Max for animating the character, I went to Youtube, then to the 3D Studio channel. They have a whole heap of tutorials in their library. I will be using THIS video to help me with my Rigging.
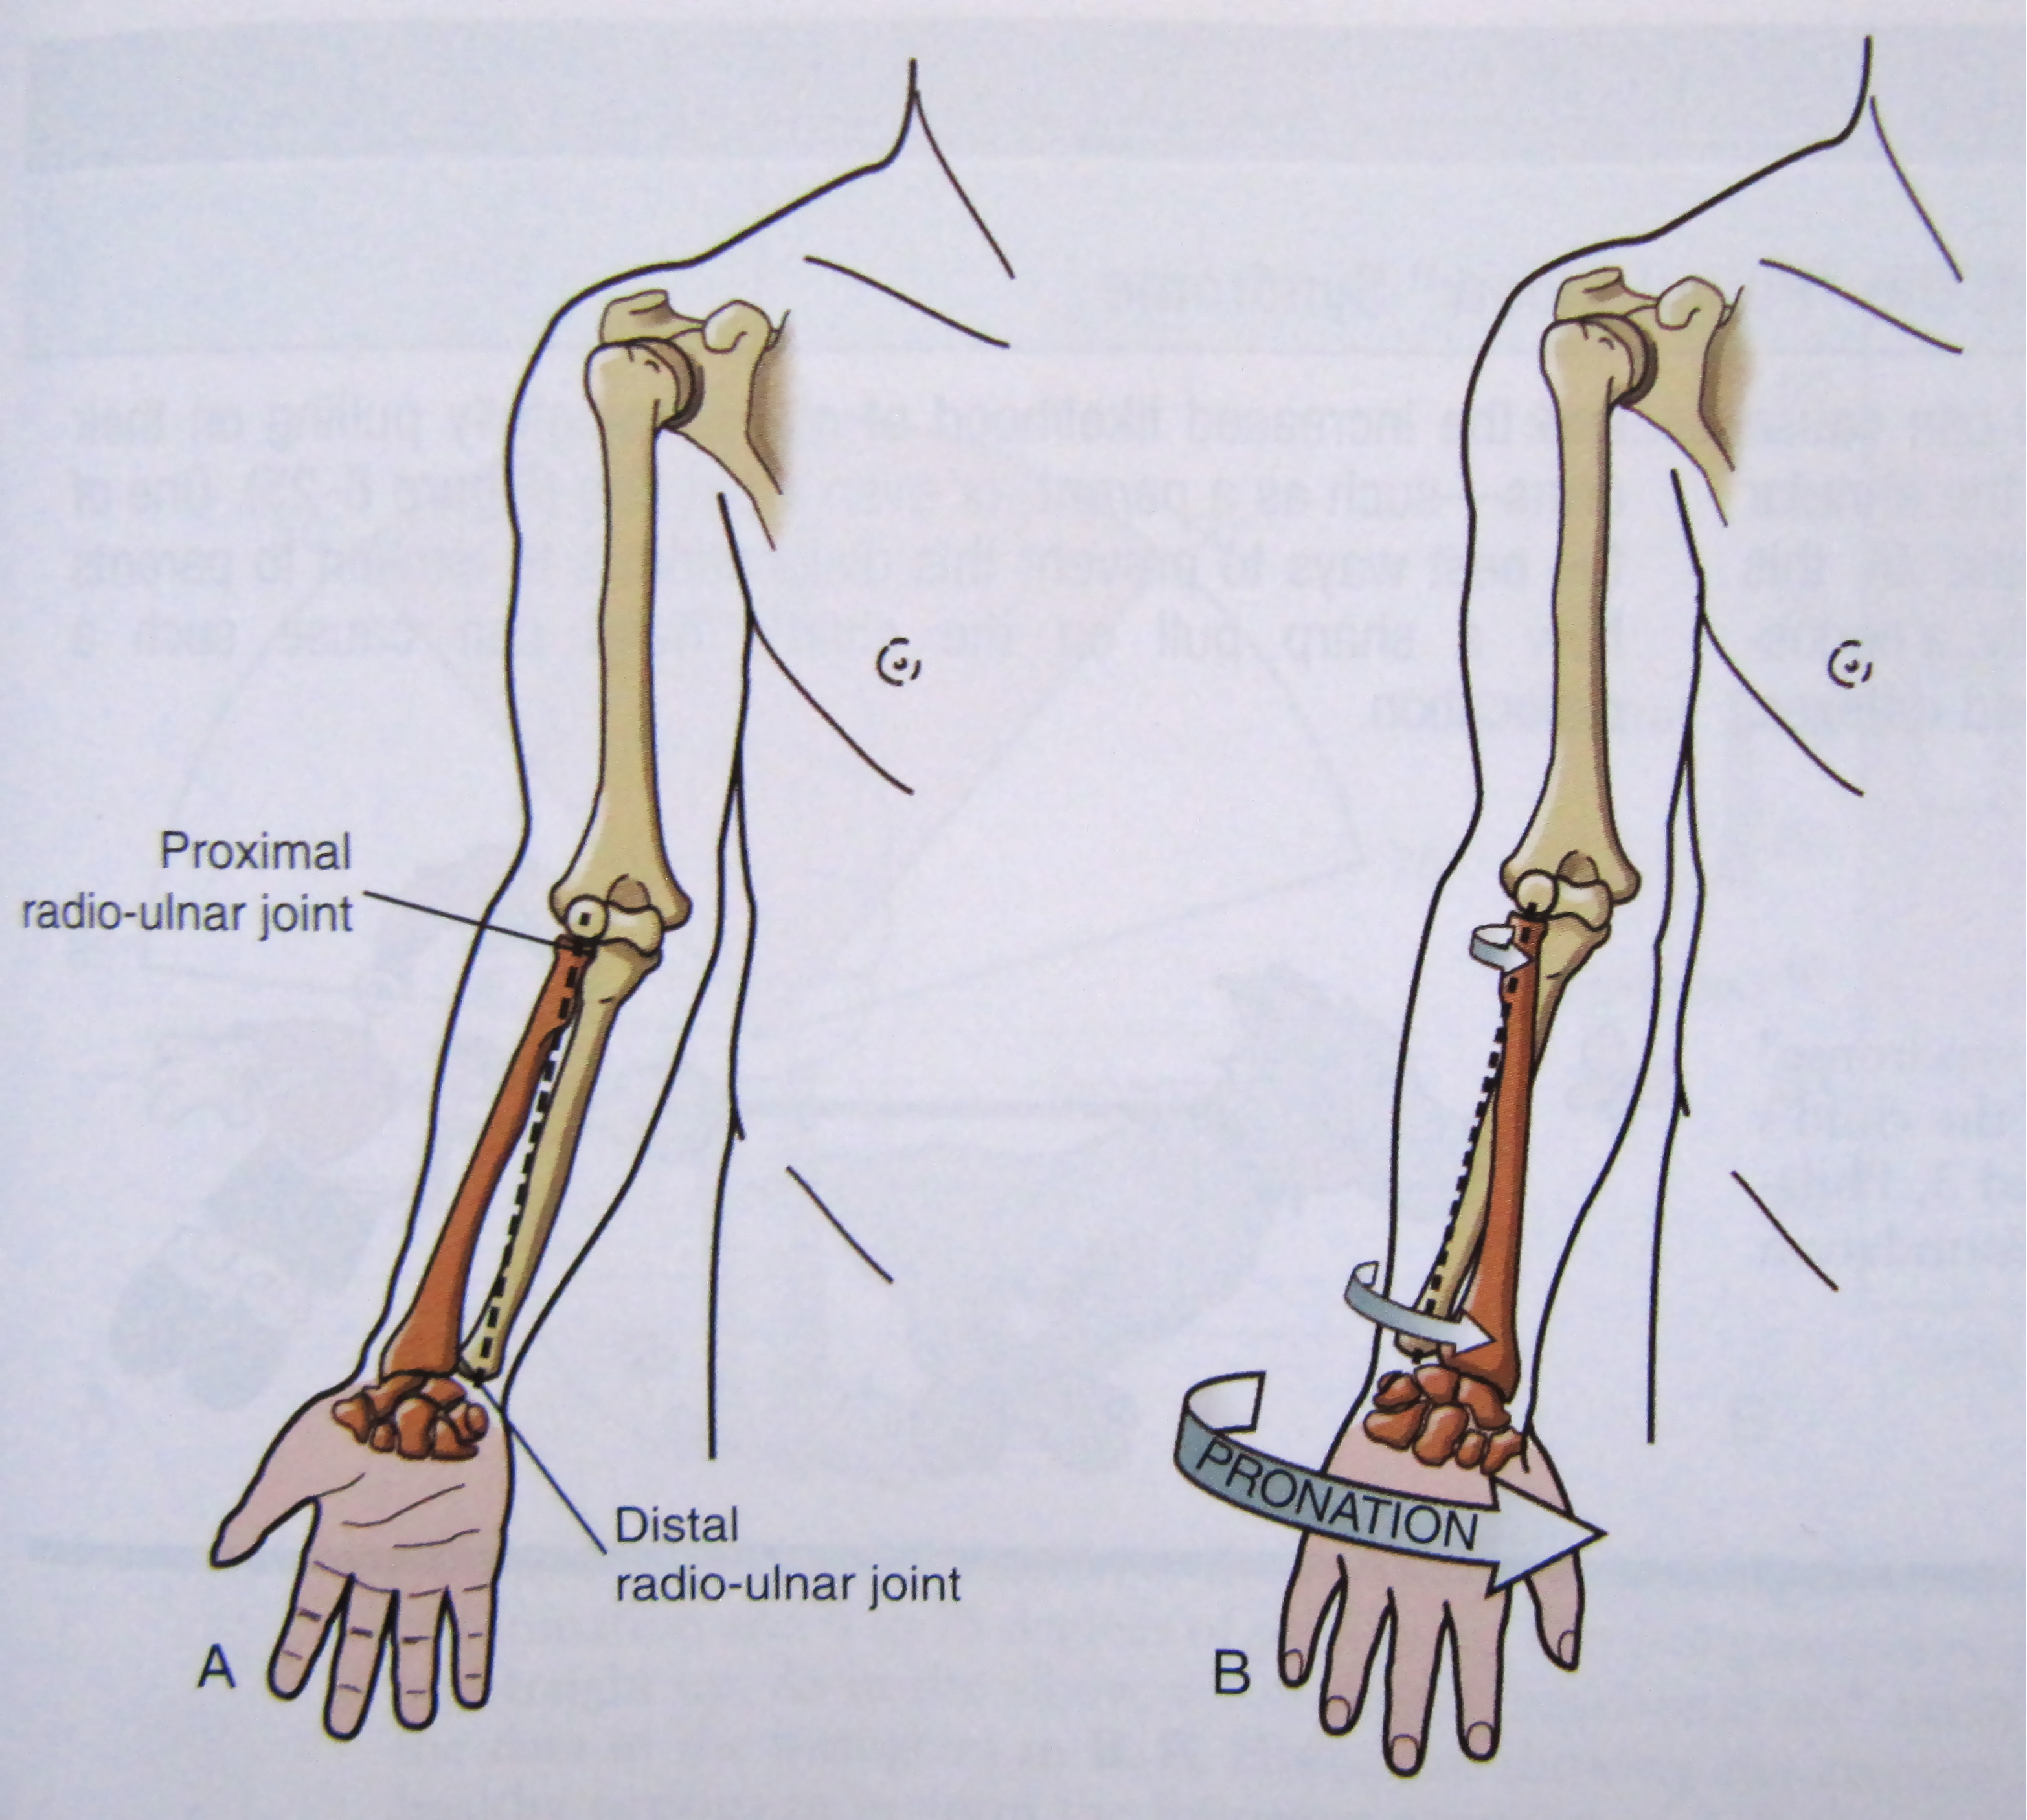
One change I will be making is by adding an extra "bone" to the forearm. This was a suggestion by my animation tutor. It stops the entire forearm from twisting when you rotate the wrist. Try rotating your wrist. See how very little of the forearm near the elbow twists? You could even argue that it is simply a muscle bulge making that area move. It's because by twisting your wrist, your Ulna and Radius are moving in your arm, along with the Carpus (wrist).
This image, from Doctor Bruce McFarlane's BLOG, ITTCS, shows how the Ulna (shown in RED) and the Radius bones move when the wrist rotates.
I will update this post with my CAT rigging attempt from following the 3D Studio tutorial, with the adjustment I mentioned.


UPDATE:
I have rigged and partially skinned a model. I have not altered the Envelopes, so there is a lot of strange action going on, like stretching and the thighs morph rather bizarrely.

I have also documented my process with a series of Screenshots.

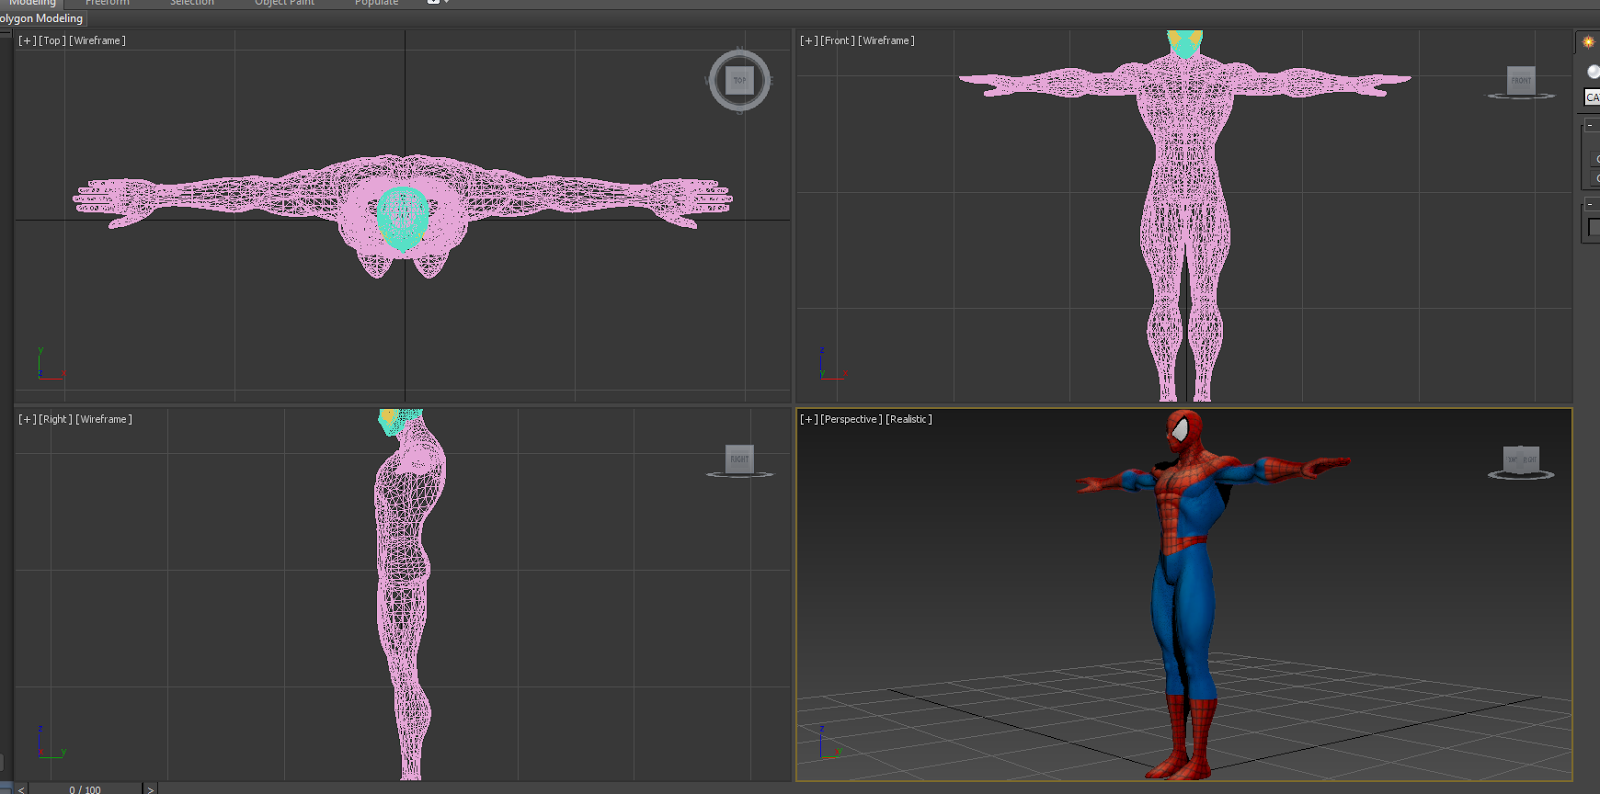
Firstly I opened the Mesh file up. Spiderman is stood in a Tpose

Selecting the Mesh, I pressed Alt + X to enable X-ray mode. I froze the mesh at this point for ease of rigging.

I created a Base Human CAT rig from the Helpers Section

In side view, aligned the rig with the meshes waist.

CATUnits Ratio alters the height of the rig. I renamed the rig Spiderman_ so all of the components would be names, for example, Spiderman_LeftFoot

I resized the waist to fill out the mesh and help aligning the legs. I also rotated it slightly. Using the Copy and Paste Mirror buttons, I placed the Legs. I also added an extra Bone to the feet. As the model is wearing boots, I don't need to make all five toes.

I align the spine and neck to follow shape of the mesh. Moving the ribcage resizes the spine bones automatically, as does the head with the neck bones.

I resize the ribcage to better fill out the mesh. This will help when it comes to setting the enveloping areas of skinning.

Aligning the arms, I moved the collarbone slightly, then began setting the arms. I added the five digits to the hand and resized them using my own hand for reference, lining up the knuckles. I added an extra section on the forearm to represent the Ulna and Radius bones.

Copy and Paste Mirror to set the other arm.

This is how the mesh and model look when combined. I select the mesh, then apply a Skin Modifier.

I use the Spiderman_Pelvis selection as my bones, then Ctrl+C to select all of the Children files within. This contains all of the bones I need, leaving out the Footpads and the main selector (the triangle with the arrow).
As the mesh is separated for the neck, head and the eyes, I do the same with them. Without this, those sections will not be animated.

As noted above, there are lots of things to be corrected. I have just uploaded this to show my working so far. My next steps will be to adjust the enveloping sections to correct the stretching.

I used the Motion section to animate Spiderman with a Sneaking animation. I have hidden the rig contained within.

Friday, 26 October 2012

How rope is made

I'll be using this as reference material for the bionic arm.

http://youtu.be/UyDHBNix6hA