Showing posts with label Concept. Show all posts

Tuesday, 25 February 2014

L5 CANIM - Performance Capture - Storyboarding WIP

Been working on the Storyboard for the 30 second Mocap/Keyframe interaction piece. For what I've got planned, I've ran it through in my head and it goes for just over 30 seconds. The main dance portion is 15 seconds!

I'm basing the dance from the Sophie Ellis-Bextor video for Murder On The Dancefloor, http://www.youtube.com/watch?v=BsISfQAXE60
The gentleman is going to be Keyframed and the female shall be Motion Capture data.
The initial setup for the dance is going to be in one take. The dance moves themselves shall be broken down into separate takes which I will piece together in Autodesk Motionbuilder.
The cup at the start will be a prop with a constraint, so that the female can hold it and drop it when needed.
I have learned to do this in a tutorial session where a model throws a hand grenade. I will be uploading a render of that soon.
I would like to have another interaction with a prop, but not sure where I can do that. Possibly extend the end of the piece and the female returns to the Refreshment table (from the start) and takes another drink?
I could then have extended the piece to maybe 40 seconds. The keyframe character would just watch as the female walks past him, leaving him behind.

Tomorrow I will be working a little more on the Storyboarding. On Thursday I will need to see my tutor, as I'm having an issue with cleaning up some Mocap data. It isn't allowing me to keyframe out mistakes! I will also be asking if the final piece will allow me to use cameras as my storyboard shows. If I can, the keyframe character will be a little easier to deal with (especially at the start of the clip. I'd be able to avoid animating him walking to the female, leaving more time to clean up data and focus on the keyframes elsewhere)


EDIT, 26/02/14

In the music video, the best example of the dance I will be recreating is in this link,
http://www.youtube.com/watch?feature=player_detailpage&v=Xn_hRh8AGNk#t=158
Time frame 2:38 onwards. There are less people on screen as Sophie was removed her competition through dirty tactics. Though the dance is relatively simple, it shows excellent use of arcs with the turning moves and even just the arm movements in the start of the dance.
I'll be drawing out the breakdown of the dance on paper then uploading it on here. The breakdown will be used as reference on the storyboard, but also for myself when Mocapping it, and the keyframe side of things for the other character.


Quick breakdown sketches of the dance moves performed in the video.Both the male and female characters do the same moves

EDIT, 22/03/14

Just about to upload my Performance Capture Wk7 Upload to Xstream now, so thought I'd share my finished Storyboards now.


Friday, 7 February 2014

Skeleton to CAT Rig

Something to bear in mind about the CAT rig is the amount of vertebrae  in the spinal column. This CAT rig is set with only about 7 sections. This is alter the smoothness in some movement, ie; bending over and back.
If I match the amount of bones on the CAT rig to around that of it's human counterpart, I should be able to recreate a very smooth arch in the back.
The picture I have attached here is a composite of the CAT and a skeleton. The RIG is slightly off, as I didn't make this RIG for the skeleton. It is the one I used in the Spiderman test. Something to note with Superheroes design is that they are often made much taller that "regular" humans. Their limbs are often slightly elongated, or in some circumstances, reduced.

Tuesday, 4 February 2014

Rigging a CAT rig


As I will be using 3Ds Max for animating the character, I went to Youtube, then to the 3D Studio channel. They have a whole heap of tutorials in their library. I will be using THIS video to help me with my Rigging.
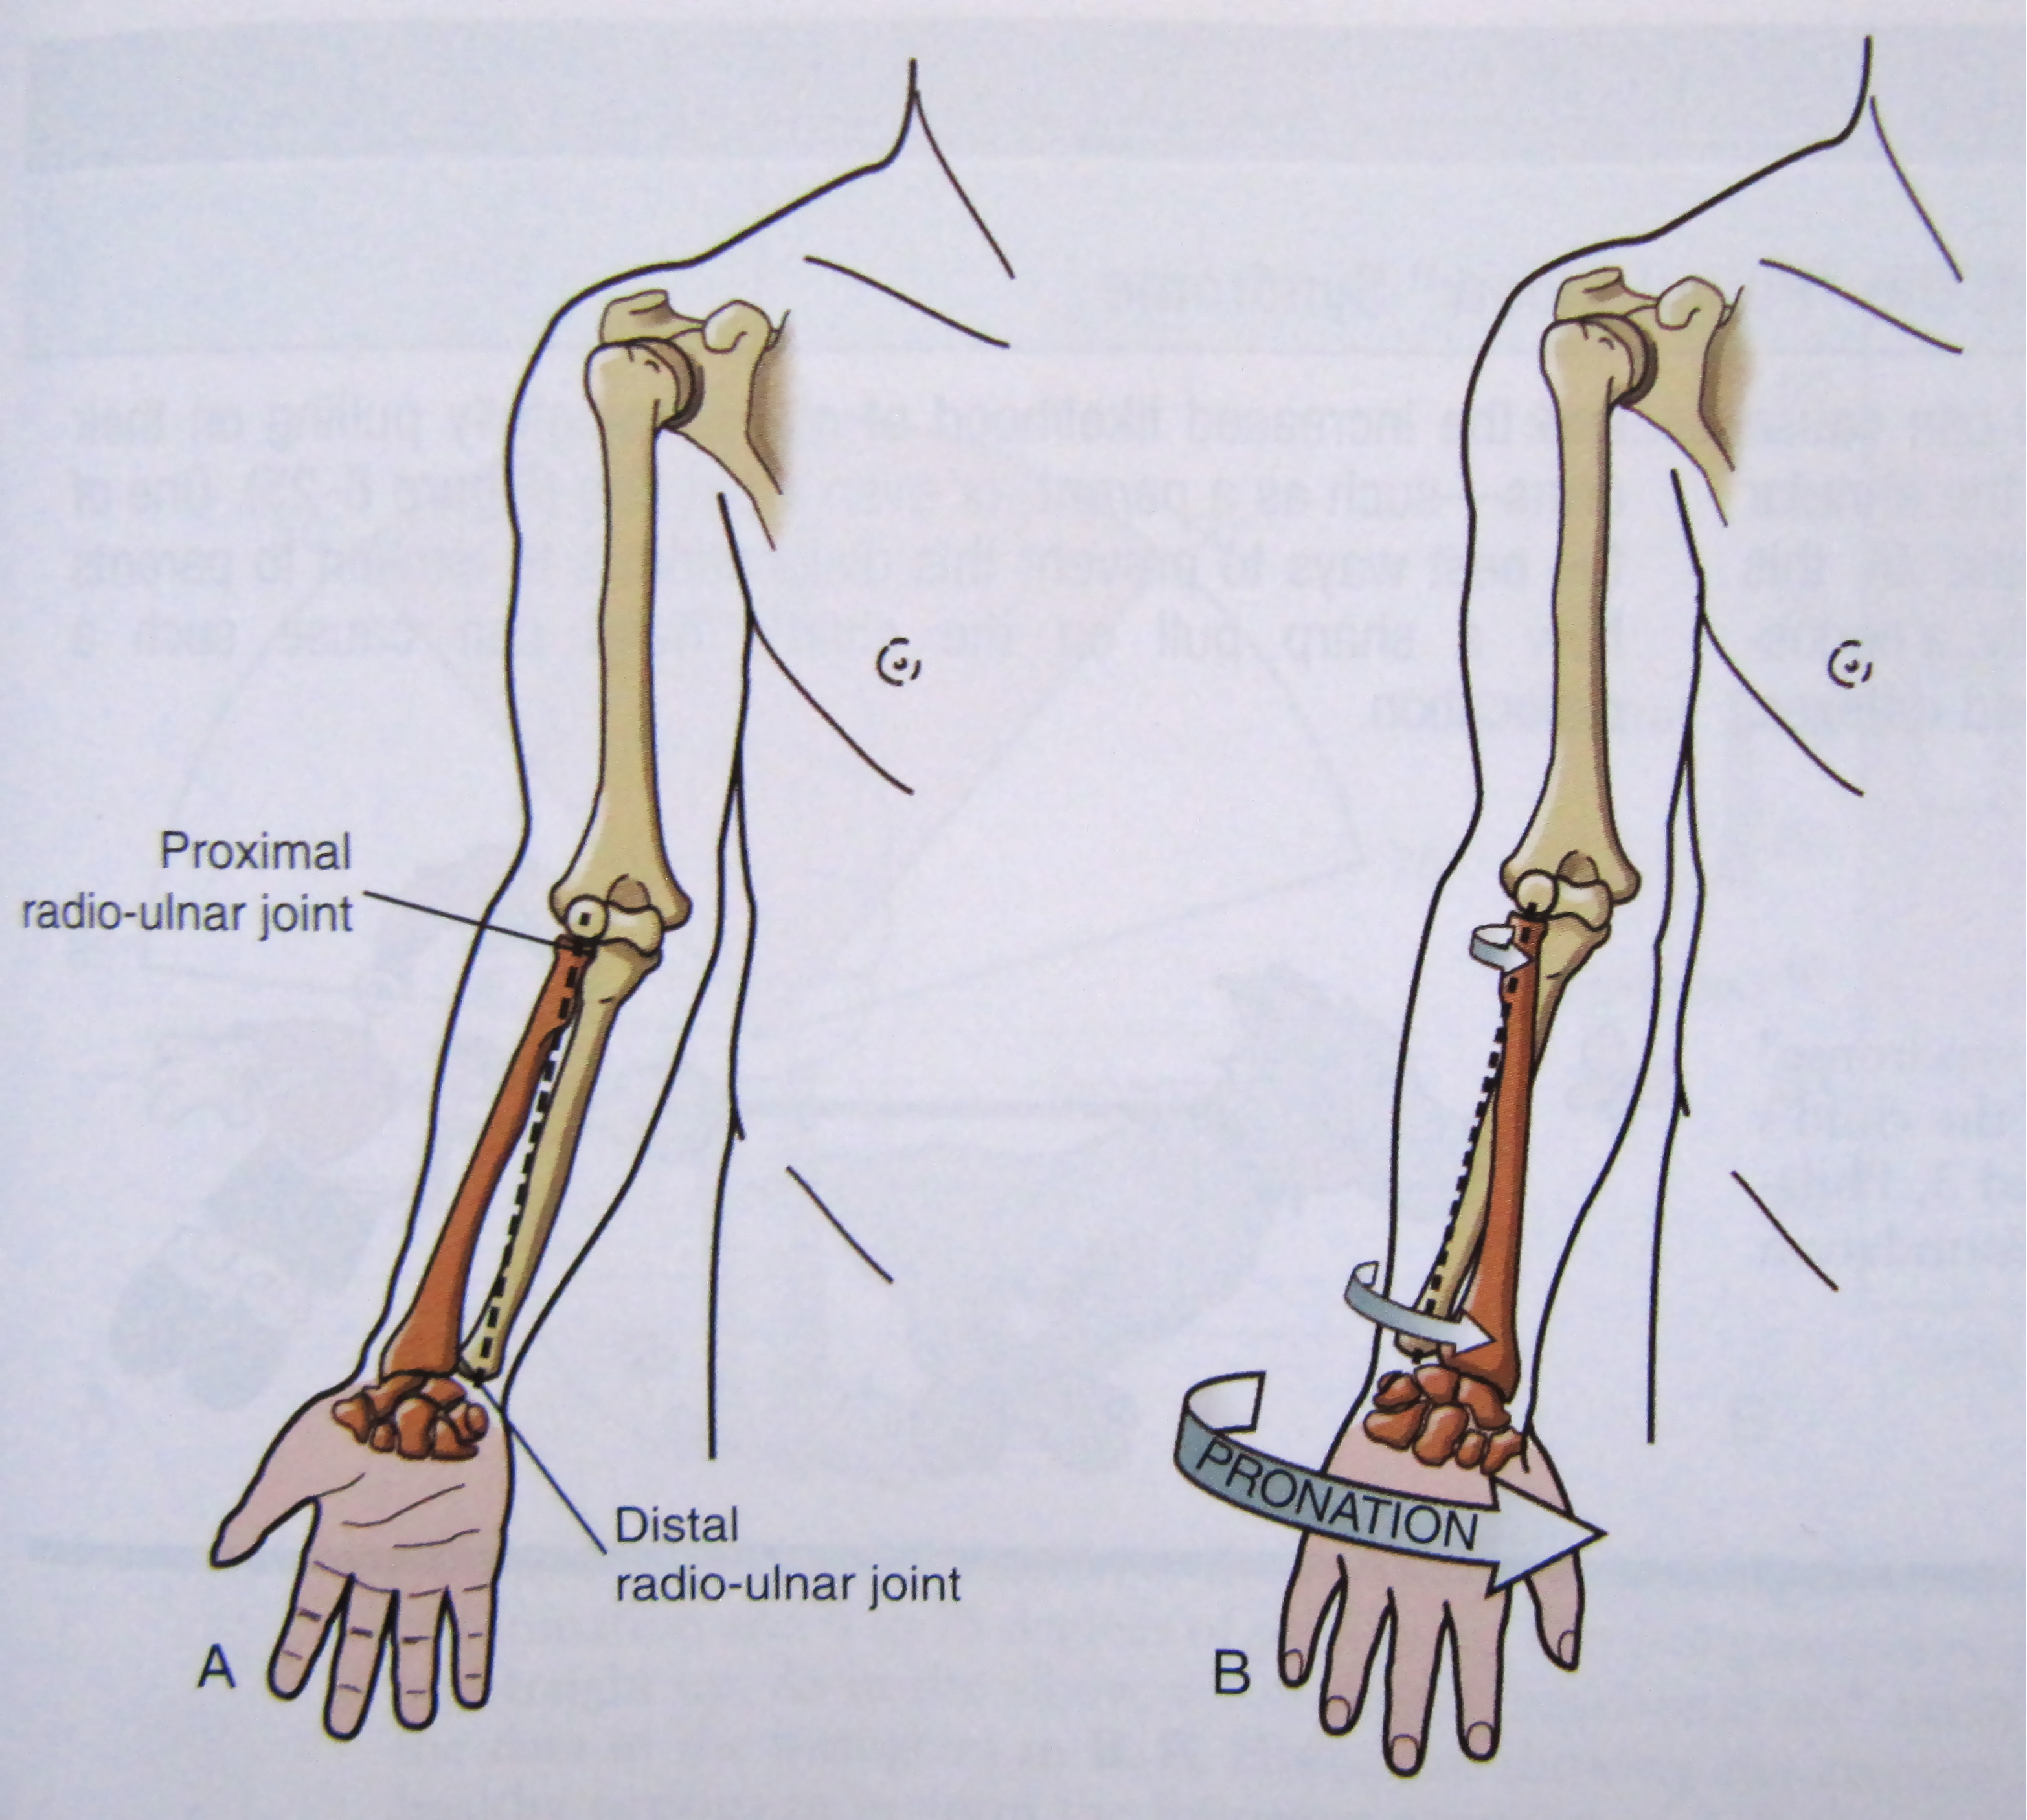
One change I will be making is by adding an extra "bone" to the forearm. This was a suggestion by my animation tutor. It stops the entire forearm from twisting when you rotate the wrist. Try rotating your wrist. See how very little of the forearm near the elbow twists? You could even argue that it is simply a muscle bulge making that area move. It's because by twisting your wrist, your Ulna and Radius are moving in your arm, along with the Carpus (wrist).
This image, from Doctor Bruce McFarlane's BLOG, ITTCS, shows how the Ulna (shown in RED) and the Radius bones move when the wrist rotates.
I will update this post with my CAT rigging attempt from following the 3D Studio tutorial, with the adjustment I mentioned.


UPDATE:
I have rigged and partially skinned a model. I have not altered the Envelopes, so there is a lot of strange action going on, like stretching and the thighs morph rather bizarrely.

I have also documented my process with a series of Screenshots.

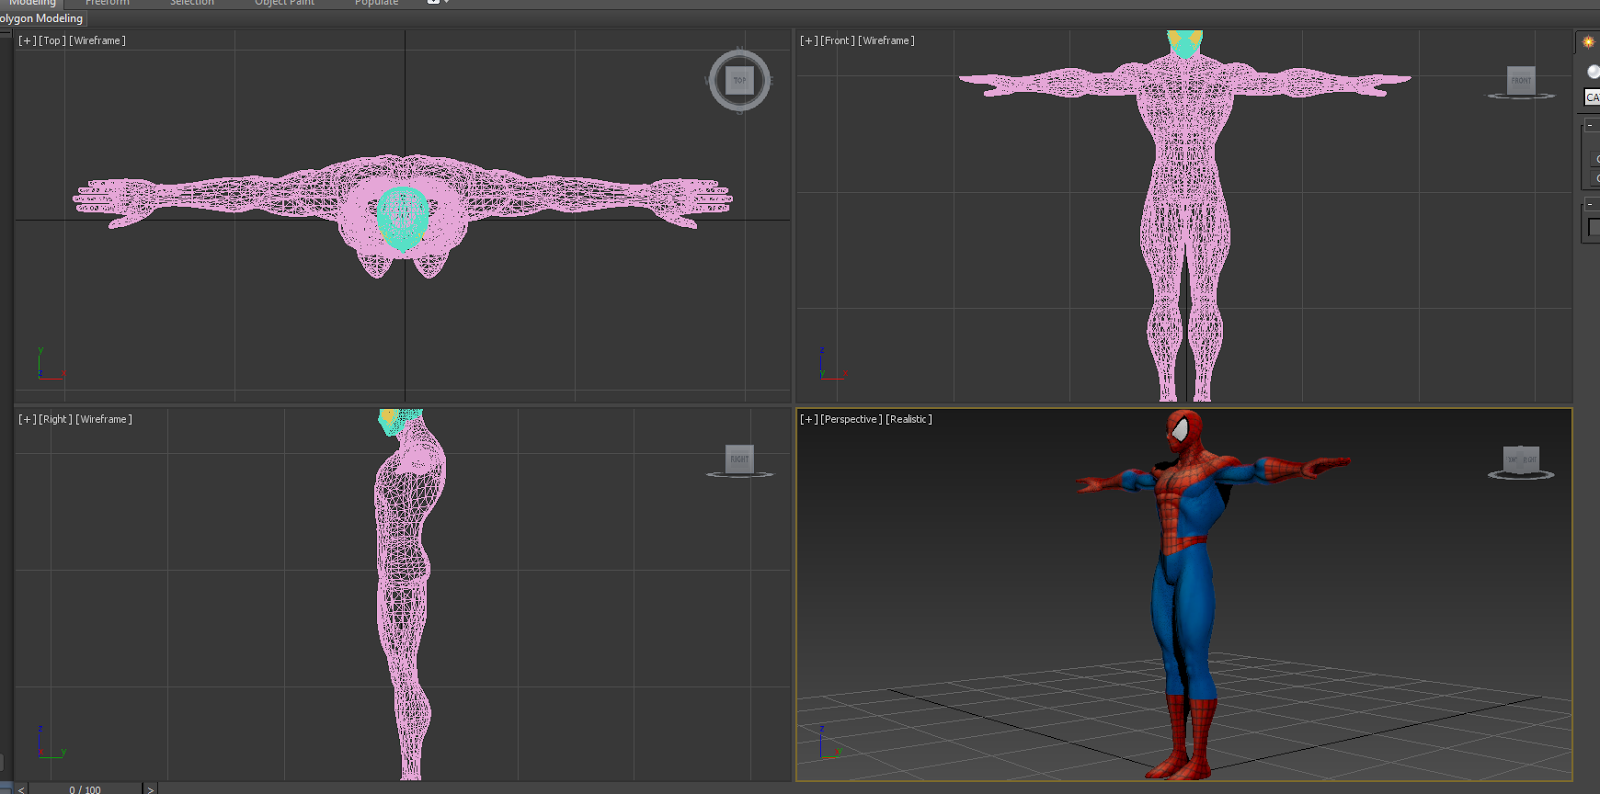
Firstly I opened the Mesh file up. Spiderman is stood in a Tpose

Selecting the Mesh, I pressed Alt + X to enable X-ray mode. I froze the mesh at this point for ease of rigging.

I created a Base Human CAT rig from the Helpers Section

In side view, aligned the rig with the meshes waist.

CATUnits Ratio alters the height of the rig. I renamed the rig Spiderman_ so all of the components would be names, for example, Spiderman_LeftFoot

I resized the waist to fill out the mesh and help aligning the legs. I also rotated it slightly. Using the Copy and Paste Mirror buttons, I placed the Legs. I also added an extra Bone to the feet. As the model is wearing boots, I don't need to make all five toes.

I align the spine and neck to follow shape of the mesh. Moving the ribcage resizes the spine bones automatically, as does the head with the neck bones.

I resize the ribcage to better fill out the mesh. This will help when it comes to setting the enveloping areas of skinning.

Aligning the arms, I moved the collarbone slightly, then began setting the arms. I added the five digits to the hand and resized them using my own hand for reference, lining up the knuckles. I added an extra section on the forearm to represent the Ulna and Radius bones.

Copy and Paste Mirror to set the other arm.

This is how the mesh and model look when combined. I select the mesh, then apply a Skin Modifier.

I use the Spiderman_Pelvis selection as my bones, then Ctrl+C to select all of the Children files within. This contains all of the bones I need, leaving out the Footpads and the main selector (the triangle with the arrow).
As the mesh is separated for the neck, head and the eyes, I do the same with them. Without this, those sections will not be animated.

As noted above, there are lots of things to be corrected. I have just uploaded this to show my working so far. My next steps will be to adjust the enveloping sections to correct the stretching.

I used the Motion section to animate Spiderman with a Sneaking animation. I have hidden the rig contained within.

Saturday, 1 February 2014

Ragdolling

Here's a render of the Ragdoll test.
The model uses a Ragdoll solver to generate the falling. I resized the effectors - if any of them are in contact, the model will instantly drop and "twitch" - to create the collision points. Adding a Rigid Body solver to the wall and setting it to Passive (so it doesn't move when hit), when the model connects with it, the animation stops and the ragdoll process begins.

The more time I spend on resizing and moving the effectors, the better the result.

I'm already getting an idea of what I want to do for the Motion Capture piece which would incorporate some ragdolling, perhaps!

Tuesday, 7 January 2014

Michel Gagne is awesome.

http://www.gagneint.com/Final%20site/Animation/irongiant/Iron_Giant_main.htm

Some behind the scenes stuff of his work on The Iron Giant (1999) - which is one of my favourite 2D animated films.
This link shows work of the "Dome Of Doom" - where the giant launches a ball of plasma(?) energy out over the sea when he is attacked by the (evil) humans! BOO! HISS!

Saturday, 14 December 2013

LEVEL 5 CONCEPT DEVELOPMENT AND ANIMATION - Storyboarding

I used these Storyboards to create my final animation.


The final image shows a mapping of the scene from a pulled out view.

LEVEL 5 CONCEPT DEVELOPMENT AND ANIMATION - CREATING LANEGAN

Lanegan took a few different forms before finalising the design.
(These images are taken from earlier posts on this blog)

The first form was this Lizard creature. I didn't feel like it fit in with the setting of the prison, so I scrapped this idea.


Thinking of Charles Manson, but demon-like, I created this character that I had been calling Man-Tis, based from his Mantis like blades and the tattoo on his arm. He was wearing his Prison jumpsuit, but didn't look demon enough.

Whilst researching prison uniforms better and capitol punishment, I came across a game for the PS2 called The Suffering, which featured creatures that were nearly identical to what I had designed.

For the demon look, I turned to The Evil Dead to look at the Deadites. The top left is from Army Of Darkness and the bottom right is from the original Evil Dead.


Remembering Ghostbusters 2's Scoleri Brothers (from the Courthouse scene), there were two ghosts that appear in Electric Chairs. Tony Scoleri is the skinny, lanky ghost who I researched further. I found some interesting notes from the development of this character.
Tony Scoleri went through three stages of development. The first stage involved using a full-sized puppet with an articulated head. Mark Wilson built the prototype and video tests were promising but Dennis Muren believed the rotoscope load required would hamper the production schedule. Tony was redesigned to be portrayed by Jim Fye. Tony's head was attached to a skullcap positioned in front of and on top of Fye's head. The collarbone was lowered to elongate the neck and add to the emaciated torso design. Oversized shoes, extra lengths of cloth strips, droopy pants, and finger extensions were added to complete the skeletal look.

Changing the blades of my character became a main thing, as I didn't want to be creating something nearly identical to what was in The Suffering. Marvel Zombies features this panel where Wolverine's adamantium bones break free. Reversing the joint where the blade is attached (from the wrist instead of the elbow) would work well.
I drew out the way the blades would attach here.

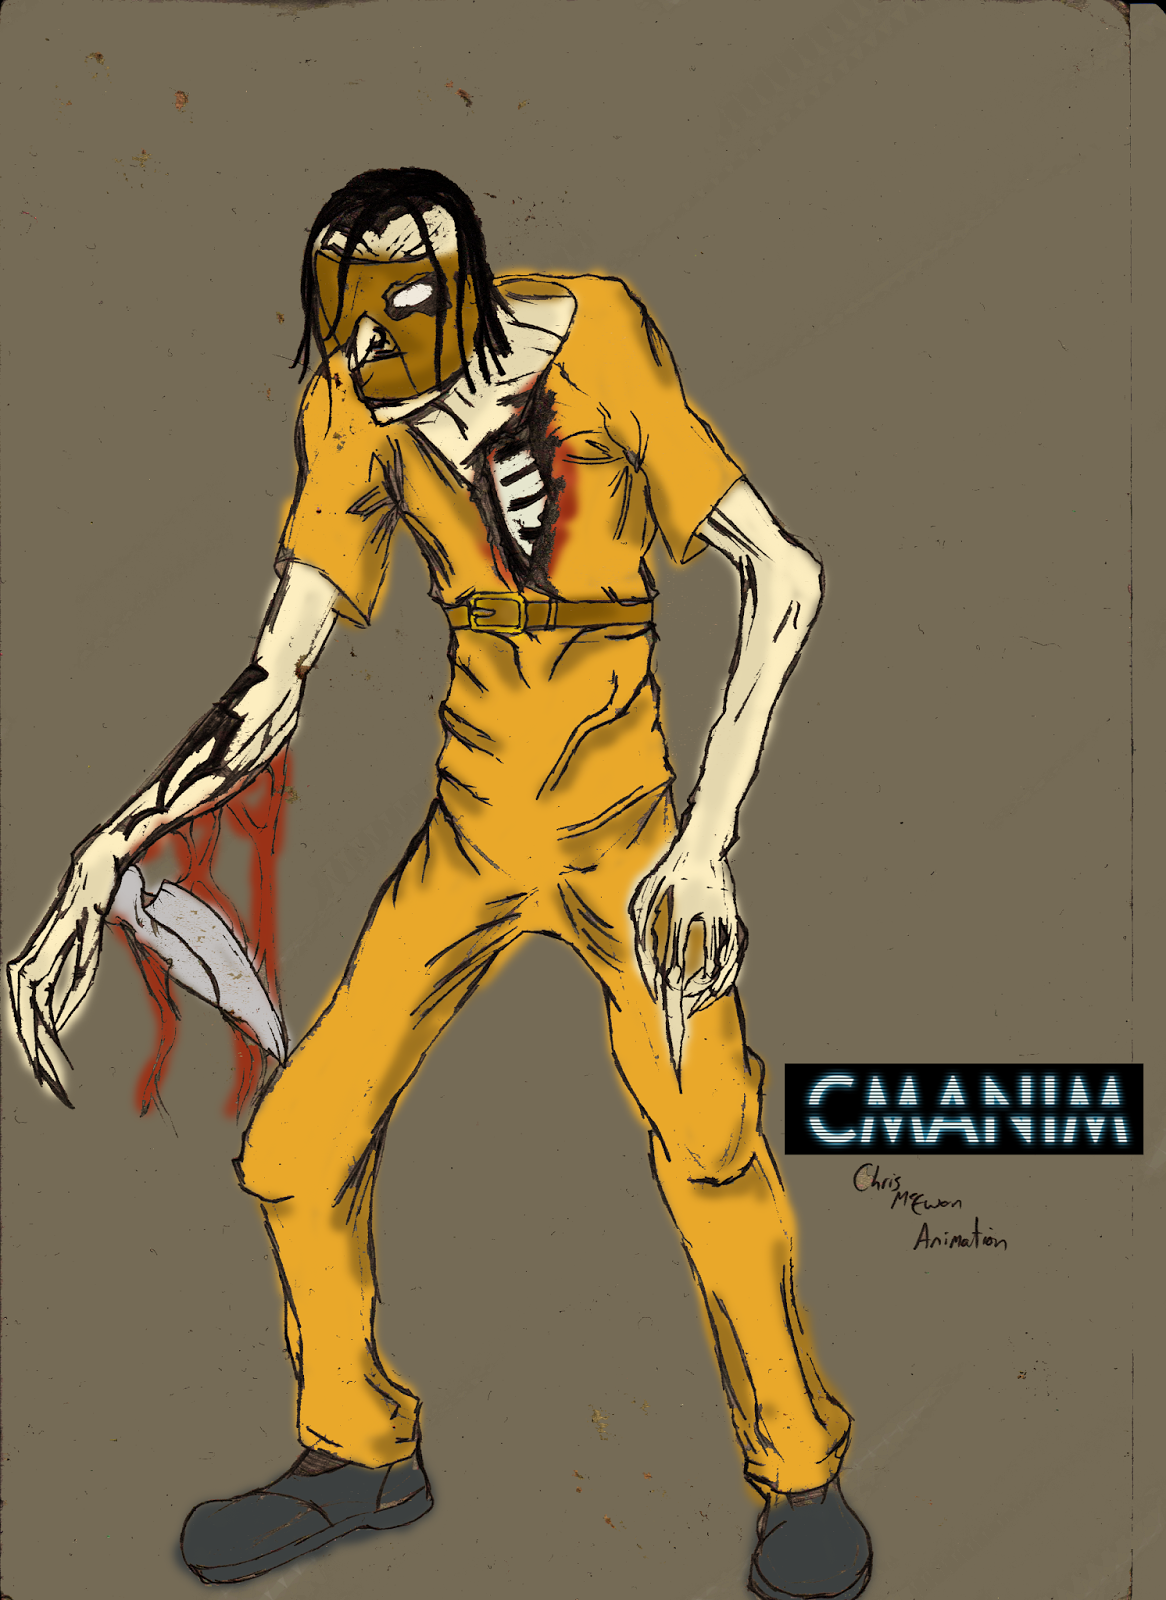
 Using the demon faces inspired by Evil Dead, I drew this happy fellow up! Given that he was executed by Electric Chair, I would give him a hood or mask, which would have been used.

This image was to show various features of the character, where the blades break from (the scar tissue), tattoos and various hoods/heads.


 Close ups of the heads.


To add colour, I placed the images into Photoshop.

A 3/4 view of Lanegan. He is extending one of his blades.

Front and side

Lanegan is charging forward, revealig one of his blades as he strikes.


Colour versions of previous images. The final image shows some muscle tone which the creature has

LEVEL 5 CONCEPT DESIGN AND ANIMATION - MERCHANDISE

Promotional give away items. I used Cafepress (a website where you can make custom items which you can buy, and even set up an online store) to create the majority of these.

Hip Flask

T-Shirt

 - I made this mug in 3Ds Max using UVW maps to add the logo. The inner colour I set to match the main colour scheme of the logo.

CMANIM mousemat

 CMANIM glass

 Being a fan of Ice Hockey, I created my own Jersey

CMANIM promo pen (I made this one in Photoshop)

CMANIM Pocket Notebook