During a Lecture, notes were taken on techniques to keep in mind when modelling. This page was invaluable to me in this project.
The project began with a photograph of my cat eating his dinner.
I began measuring aspects of the room so I could make the room as accurately as possible.
Week Six Pitch Presentation items:

Before using the Raytrace and Phong settings, the sugar pot looked like this.

Side Counter

Mugs. The feedback from these was that the edges were too sharp and wouldn't be drinkable. I took that feedback and created a much better mug (see later)

All the items together

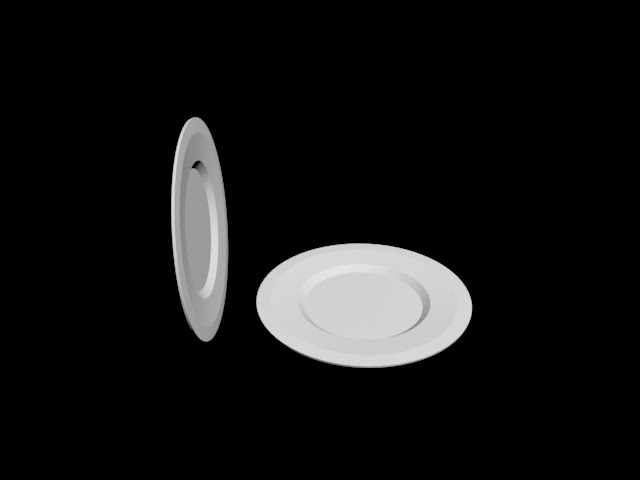
Plates

Reference for the sugar pot.

This was the first render image of my room. It was just the sink counter, this side bench, the window opening and the pots (which later became just one).

I began to texture the room. Following a tutorial sheet supplied by university for a weekly challenge, I began working on this. I used a wooden texture as a WIP before I took photographs of my kitchen.

As I began making more models and getting more comfortable with texturing, I was using UVW Unwrap constraints for more pieces. The benches, cupboards and the Oven were done with this tool, enabling me to use photographs as textures. (I will show the maps I created in a later post).

The last counter I UVW mapped was this one, adding cupboards. There is also a bump map used to emphasise the gap between doors.

I made a few more models to populate my scene.

The bin and toaster were made, The bin is made from a Sphere and a pair of cylinders with some scale tool editing. The toaster was a bit more involved. Using the Free Form Surfacing methods provided by the FFD constraint. I was able to bulge the sides out and curve the top sides. The handle was made from Box Modelling. I used a UVW Unwrap constraint to texture the toaster. The UVW map that I rendered from it was placed into Photoshop and had a Brushed Steel texture (I kept this texture from last year, which I used when modelling a Hoverboard. Brushed Steel never comes out of use!) placed onto the map. I drew in the handle's channel, the bread slice area and the buttons in Photoshop. I added my CMANIM logo to the side. The main reason for this is because I lost a mug that I made with the logo on it when my external Hard Drive broke whilst backing up files. When I remade the mugs, I couldn't get the UVW Map to align correctly (it was curved out and I couldn't get the CMANIM to line up right)

This was the map that rendered out.

Placing the logo like this would bend and warp the image out and looked horrible. Breaking the image up and placing it at angles just made it look terrible. I opted out of using this design, but I have a render of the original mug.

The Lost mug...

I placed the bin and the toaster into the scene. Underneath the counter you can see the cat's bowls.

Making the bowls:- I started with a Line Tool, drawing out the cross section and applying the Lathe constraint, making a small pot.

Next I used the Melt constraint, giving it a setting of Ice, then melting it until it resembled a pet bowl.

The second bowl was made in the same way, but without a Melt constraint.
The idea for these came from a weekly challenge from Level 4 and our introduction to modelling in 3Ds Max.

We had been tasked with making a vase/pot

Then using the XYZ alignment to change the look of the line/lathe I found mine looked like a pet dish.

Alt Look.

I made a Towel rack and towel. The rack was made with box modelling, raising the ends into sort of bulbs. The towel was made with the Cloth Constraint. A big thanks to Phil Baggott of
http://philb15anim.wordpress.com/ for helping me with the Cloth constraint.
You can also see the window frame I made. When I left High school, I worked in a Window and Door frame factory. The things I learned there finally came into use when making this. The Mullion (the cross bar between the solid window and the Sash - the bit that opens) is in line with the main frame, then the Sash window is offset.
The taps on the sink were made and placed.
To make the taps, I watched a Tutorial by a Youtuber called Esperantful. I changed the design slightly, as the model he was making was more of a Bathroom tap.

A better shot of the taps with the sink.
I also added the curtains (again, big thanks to Phil Baggott) which was made in the same way as the towel. The texture was from
http://www.cgtextures.com/ - A fantastic source for free textures.

This was used on the main curtain and the cloth sheathe that holds the curtain to the sides.

I used this to create a Net curtain on the outhouse door. I added a transparency setting and it gave a nice effect.

This was the final WIP render I did. I remade the mug (without the CMANIM logo) and placed it in scene (I changed the colours on them for variety). I wasn't sure about the colour of the orange mug, so I asked the opinion of a L6 design student who suggested toning the harsh colour down, making it more pastel. That is applied in the final renders. I added a kettle and textured it with a Multi-Sub object, colouring the lid and handle black. The body is Brushed Steel.
In the back, under a counter is the Cat bed. I wanted to make the cat bed as it is an interesting shape. A box, couple of cylinders and a thinner box for a platform. The hammock is a Tube with a cloth constraint and is held up by a rope (same texture as the scratching posts).The box has a section removed by Boolean.
The cupboard counter has a cutting board which has a reflection and secularity setting and a marble texture (from
http://www.cgtextures.com/)
I made Skirting boards and door frames with the Sweep constraint.
This technique didn't work for me, as the floor isn't shaped as the room. I built the room on a large Plane. But I modified the idea they used for my own situation. I drew out sections I needed with the Line Tool and applied the Sweep constraint. I had to invert the V and set the alignment to bottom left. It created the perfect skirting boards. I used the same technique for the door frames, but with a box shape.
The Tiles were made and placed around the room. They reflect the scene slightly.
I added Plug sockets, light switches and an immersion heater switch.
I placed the textures for them onto boxes. I couldn't find them on CG Textures, so I Google Searched them.
For the final renders, I created Plugs and cords. The plugs were box modelled and the cord was made with the Sweep constraint.