The cheeks form part of the smile, but also as part of other expressions to some degree. The important part, I found, was getting the crush around the eyes right. Too much and the eyes would be shut, too little and it just wouldn't look right.


The Ape Man's nose flare is essential when making the character look either angry, annoyed or disgusted. This had the lips edited for maximum anger, if mixed with the eyebrows, or to show disdain.


Another reference shot, plus the final Ape Man result.


I thought I could improve upon the Eyebrows we were given, make them look more furious than they already did. I was sure to keep the furrow in the center of the brow. Mixed with the Nose flare/Lips, you get a really angry looking chap!


An "OO" styled mouth. This is used in both human speech and for Ape characters. I wanted to make sure the lips protruded enough to look convincing, so used multiple shots.


The eye above was a first attempt at it. After a couple attempts, I managed to make the final results. I couldn't find a way to flip the mesh in Zbrush, and when I mirrored the OBJ in Max, when I attached a slider, it would animate the Morpher flipping. Even when collapsing the stack to Editable Poly, it would continue to do it. In the end, I had to try my best to recreate the eye on either side.

Here is a comparison of my Custom Morph Target and the provided one for the Angry Eyebrows. My one (left) has a more severe angle, and the furrow in the middle really helps convey the anger.

I placed the Sliders in sections for easy use. Eyes/Brow on the top, Middle face in the middle, then mouths on the bottom.

After I finished placing all my targets onto the scene, I also made a list of which I made, as the provided morph targets would help with the animation.

Here two of the morph targets are imported into the scene, then added to the Main Rig's Morph Target list. After this was done, I would just hide the morph targets, then link the sliders to the main rig.

When programming the sliders, I found the easiest way involved adding *100 to the wiring. It became second nature to me to do this (or else the move would have been a tiny amount) and I couldn't get away with the alternate way we were shown.
The first two completed Morph Targets were the cheeks and the "OO" mouth. Here I rendered them one at a time, then together.

Using the image above as a base, I tried using a couple of the Morph Targets to make an angry Ape
This was before I had made my own Morph Targets, and was more for just getting used to animating with sliders.
This video shows my set up and shows the sliders directly affecting the rig.
Whilst preparing to animate the facial rig, I selected the sound file I would work from and imported the file into 3Ds Max

Stephen Brooks of Rubber Onion Animation (LINK) gave me this feedback. Once I have made this, I shall update this post.
With the feedback taken onboard, I went back and created this version. I think the cocky smile at the end is a great addition.

Really getting to grips with the Curve Editor. It often lets me down in the past, but I've really got behind it this semester in both Max and Motionbuilder. Once I got stuck in, it began to make sense to me more and more. I still have a long way to go to be perfectly comfortable in it, but it's a start!

A second review from Stephen Brooks on how to further the animation, and in some cases, step it back as there's a lot going on. Again, I will update this post as I continue.
Version 3 of the Lip Sync. Using the Curve editor, I smoothed out the "pop" on the mouth, which gave a nice Easing. The mouthing of "and" was removed (which, when looking at how I speak, "and what" are formed simultaneously.) The Eyebrows were removed from the end and the eyes opened up.

I then went and used myself as a reference instead of the Van Damme clip.
Version 4. It's nearly final! The only things I need to do to this is more of an "OO" on the mouth when he says "What" and a bit more easing on the final eye position.
Version 5, the final version. The wrinkles are ironed out and the brass is polished. A big thank you to Stephen Brooks who took time out of his schedule to give me pointers. Your help has really brought my work on in leaps and bounds.
Animator Rob Yulfo (LINK) was also asked to check my work. He liked it and was interested in how I made it.


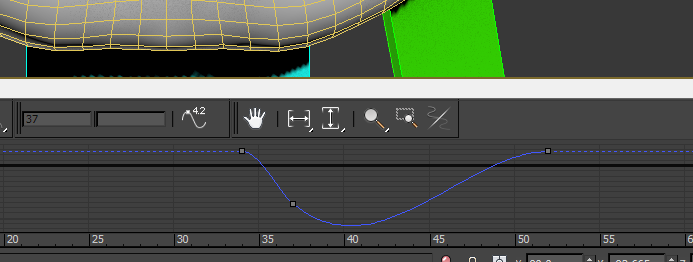

I skinned the mesh to a CAT rig and weighted it appropriately
Using the CAT controls, I was then able to Keyframe animate the rig
Using the Curve Editor, I smoothed out any jerky movements.
I skinned the mesh to a CAT rig, then I animated the rig to give even more character.

Stephen Brooks agreed with the edits I had to make and had no further changes that he could spot.

Alan Thompson is a 3D modeller who makes models to enhance PC games, from weapons to characters. He, as of posting, doesn't have a website.
As I really enjoyed the Morph Target facial animation, Alan pointed me in the direction of a book he used in his Dissertation, Paul Elkman - Unmasking The Face. I would like to do more facial animation in the future, so this book will come in handy. Thanks, Alan!

A friend of mine who studied Architecture in at Uni asked if I would like to use Vray as my renderer! So I gave it a shot! It took about 40 minutes to render on default settings with Vray.
I did a test on High Quality and it was going to take more time that I'd want to spend on a low poly mesh which has no texture.
Instead I opted for Mental Ray. This still took almost 2 hours to render (and it's only a couple seconds. This clip is repeated for ease of viewing). It is on High Quality. I opted to stick with Mental Ray for this render, as the time difference and the image quality for Vray was not worth it. If I was doing a 3D environment, Vray would be the way I'd go, but for a low poly mesh and strict time constraints, I'll be taking Mental Ray this time.
Lip Syncing is something I've had trouble with since I started animating in Flash in High School. It was always getting the timing right that would make it or break it.
I have two excellent points of reference.
Rubber Onion have a couple "Tip in a minute" videos on Youtube and he tells you everything you need to know in that one minute. Key points are form the shape of the mouth a few frames before they say it. As Brooks says, "Think See it before you hear it"
Richard Williams has a great section on Dialogue in the Animator's Survival Kit, breaking down through the phrasing and how to set it up on a dope sheet. The interesting thing I found on the Dope Sheet example was how he broke the words down on it into the sounds, rather than the spelling. In his example "I'll slip into..." the Dope Sheet reads, "I-LL-S-L-E-P-E-N-T-EH"
This makes for the character's accent and makes it clear which mouth shape you need to use.
It's just a little thing, but it's something that I had never thought of!
Bone Rig Facial Animation
I found a couple videos of Youtube for the muscle structure rigging of the face. Although this is not how we have been shown how to set up the rig, it's good to keep this in mind.
http://www.youtube.com/watch?v=3Z0nbAm2HPw
http://www.youtube.com/watch?v=Xmz3oLrnzBw
They show great facial expressions.
Bone Rig facial animation.
I really did not enjoy this way of facial rigging. I didn't feel I had as good control over the rig. A few areas that I tried to skin, the nose, the cheeks, seemed to destroy the mesh. I had to leave those parts out as I could not get them to work, which really affected the final piece.

Having made the mouth in class, I moved on to the Eyebrows. Adding a bone from the skull, then resizing and aligning the bones in place.
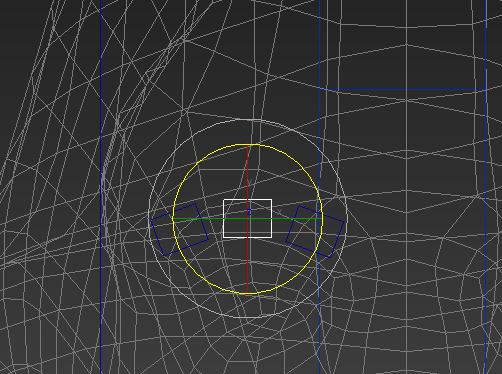
I made three, then arched them around the eye. This would allow some good articulation on the eyebrow. The same was repeated on the opposite side, then they were skinned.

Using the Reaction Manager, I would link the slider to states, which would create the animations just by moving the sliders.

Sliders with the states set up.
MY FINDINGS FROM FACIAL ANIMATION
I found setting up bone structures to be a real pain and didn't allow me the control that the morph targets did. Any mistake in the animation resulted in having to redo sections from the animation layers which were time consuming, whereas the Morph Targets had their expressions pre made in Zbrush and were solely dependant on the sliders to deal with. I don't think the mesh was too helpful, either. the face seemed to have been smoothed right down. The Morph Target mesh could have possibly been a better choice. As time can be a large issue as deadlines loom, I think I could see myself using Morph Targets to do facial animation. I was just more comfortable with that pipeline and process than the bone structure.
MORE REFERENCE:
CAT rig facial animation part 1
https://www.youtube.com/watch?v=K-fLf45Z3JU
Part 2.1
https://www.youtube.com/watch?v=cnq0DmmoYgU
After watching these videos, I see that Bone Rigging, on a good looking model, can come together really nicely. If I was had to (or got the chance to remake this piece for my upload) do Bone Rigging again, I would follow this tutorial. (I really wish I had found these sooner).